Getting started with simulive streaming
Simulive streaming works by letting Clevercast stream pre-recorded videos as if they were ‘real’ live streams at a scheduled time. Viewers are unable to notice any difference.
This tutorial explains how to create a simulive source item, and use it in a simulive event or webinar. For more info, see the simulive streaming manual.
1 Upload the source video
For any simulive stream you first need to upload a video to Clevercast, consisting of a single video and audio stream. Go to the Upload menu and select the source file. Before starting the upload, make sure to select the 'Simulive Uploads’ workflow profile and the correct audio language (or 'Original' if the floor audio contains multiple language).
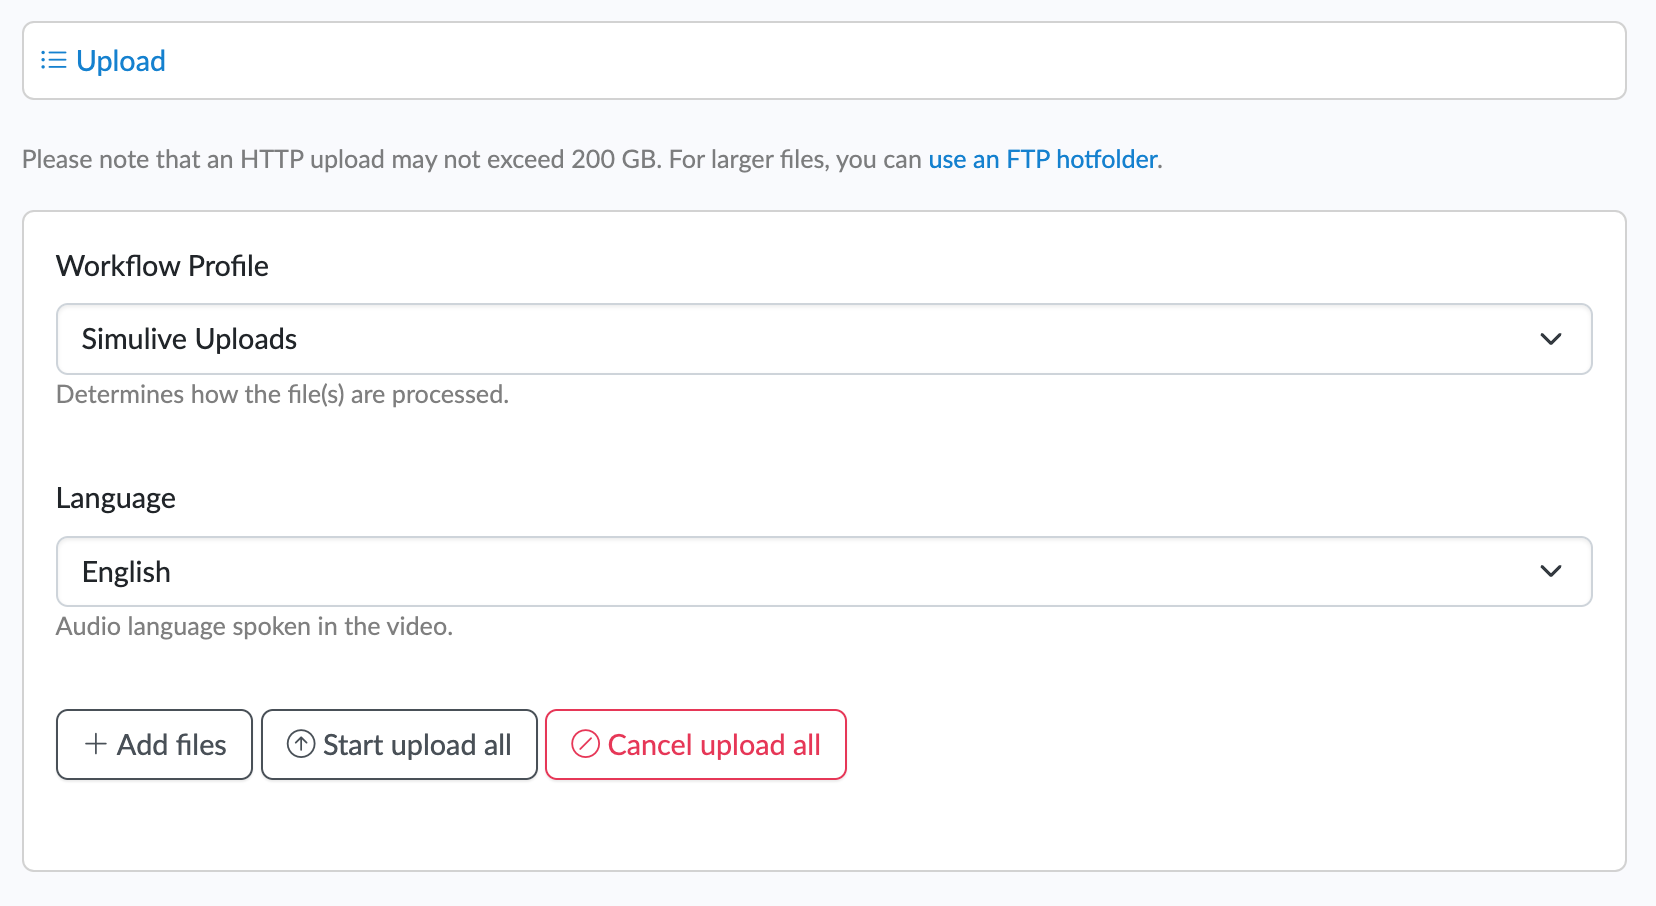
If your source file is very large, you can upload it through an FTP hotfolder instead.
Clevercast will transcode your source file to a format suited for adaptive live streaming and transfer the different resolutions to our streaming servers. This will take some time.
Important: simulive streaming requires that your video has an intro and outro of at least two minutes, to ensure that all viewers will see the actual video in full under all circumstances.
2 Adding extra audio languages (optional)
If you want the live stream to have multiple audio languages, you need to create a new, multilingual item.
Once the uploaded file has been turned into a VoD item, go to its detail page and select Actions > Create Multilingual Video in the left-hand menu. This will direct you to a page where you can upload an MP3 file for each audio translation (which must have the same duration as the video).
After all MP3 files have been uploaded, press ‘Create Multilingual Item‘: Clevercast will create a new multilingual item and transcode it for adaptive streaming. When this item is ready, it can be used as the source of a multilingual simulive stream.
3 Adding closed captions (optional)
To add closed captions to an item, select the Actions > Add Closed Caption menu on the left of its detail page. This will display a popup dialog that lets you upload the WebVTT file for a given language.
The uploaded WebVTT files must be valid (e.g. see this online WebVTT validator). The uploaded WebVTT files must be valid (e.g. see this online WebVTT validator).
Make sure that the captions take into account the duration of the intro. If the intro was added afterwards, make sure to time shift the WebVTT file before uploading it.
4 Creating a simulive event (or webinar)
Go to the Live > Events page and create a simulive event. The broadcast protocol can be:
- Simulive streaming with single audio for an item with a single audio language
- Simulive streaming with multilingual audio for an item with multiple audio languages
Closed captions are compatible with both protocols. When an item contains closed captions, they will automatically be part of the simulive stream.
Note: for webinar accounts, create a simulive webinar instead.
5a Scheduling a simulive event
On the Management tab of the event page, go to the Set Simulive Stream panel to schedule the live stream. When you schedule a simulive stream, you must fill in the following:
- Broadcast Start Time: the time at which Clevercast will start the broadcast of your video.
- Select Item to use: the item to be used as the source of the broadcast.
- Show Countdown in Player: if checked, Clevercast player will show a countdown timer to the start of your live event.
- Intro Seconds: the duration of your intro, used to determine the end point of the countdown timer.
The Broadcast Start Time thus determines the start of your live stream (for example, if you set Broadcast Start Time to 6:00 PM, Clevercast will start broadcasting at 6:00 PM). Shortly after the broadcast starts, Clevercast sets the event status to Started, making the live stream visible in the embedded player (see also Simulive event flow).
You also start a simulive stream manually by pressing the Run Simulive Stream Now button or clear a simulive stream that was previously set.
5b Scheduling a simulive webinar
In case of a webinar, the start time of your webinar is used for a simulive stream. However, since this is the time your webinar actually starts, Clevercast will already start broadcasting the intro in advance.
In the Live Management tab of a simulive webinar, you must enter the following:
- Select Item to use: the VoD item to be used as the source of the broadcast.
- Intro Seconds: the duration of your intro in seconds.
Clevercast uses the 'Intro Seconds' to determine when to start broadcasting (for example, if your webinar is scheduled at 18:00 PM and your intro is set to 120 seconds, the broadcast will start at 17:58 PM). Shortly after the broadcast starts, Clevercast sets the live status to Started, making the live stream visible in the webinar player (see also Simulive webinar flow).
You also start a simulive stream manually by pressing the Run Simulive Stream Now button or clear a simulive stream that was previously set.
6 Stopping the live stream
Clevercast broadcasts the entire source item. Half a minute before the broadcast ends, Clevercast automatically sets the event or webinar status to Ended. The player detects this and shows the Ended image (or message) that that you can set on the Appearance tab. This why the video needs an outro of at least two minutes, taking into account the HLS latency.
Note: the End Time of your webinar is NOT used to determine when the simulive stream ends. Clevercast will always broadcast the entire duration of the VoD item.