Using the Real-time Management room
The Real-time Management room can be used to:
- manage correctors for events with AI captioning and/or audio translation
- manage interpreters for events with human interpreters
- manage transcribers for events with human captioning
As a manager, you can see everyone's status and communicate with through text chat. In case of interpreters, you can also listen to them in real-time and (un)mute their microphones.
The video player can be used to watch the video stream without latency. In the future, it will also be possible to see AI closed captions and audio languages in this player.
It also lets you perform other management actions during the live stream, depending on the type of event:
- for AI events, you can pause closed captioning (eg. to avoid extra costs while you are testing the broadcast) and change the speech-to-text conversion language during the event.
- for events with human interpreters, you can update the floor audio volume that is used as background in the translated audio streams
To access the Real-time Management room, you must be logged in as an admin in Clevercast.
Connecting to the room
In the top right corner of the page, you can see the event status. Like the interpreter rooms, this room is only available when the event status is set to Preview, Started or Paused. If this is the case, press the Connect button to activate the real-time video stream and text chat. If the connection succeeds, a green check mark will appear behind the 'Stream' and 'Text' indicators at the top of the page.
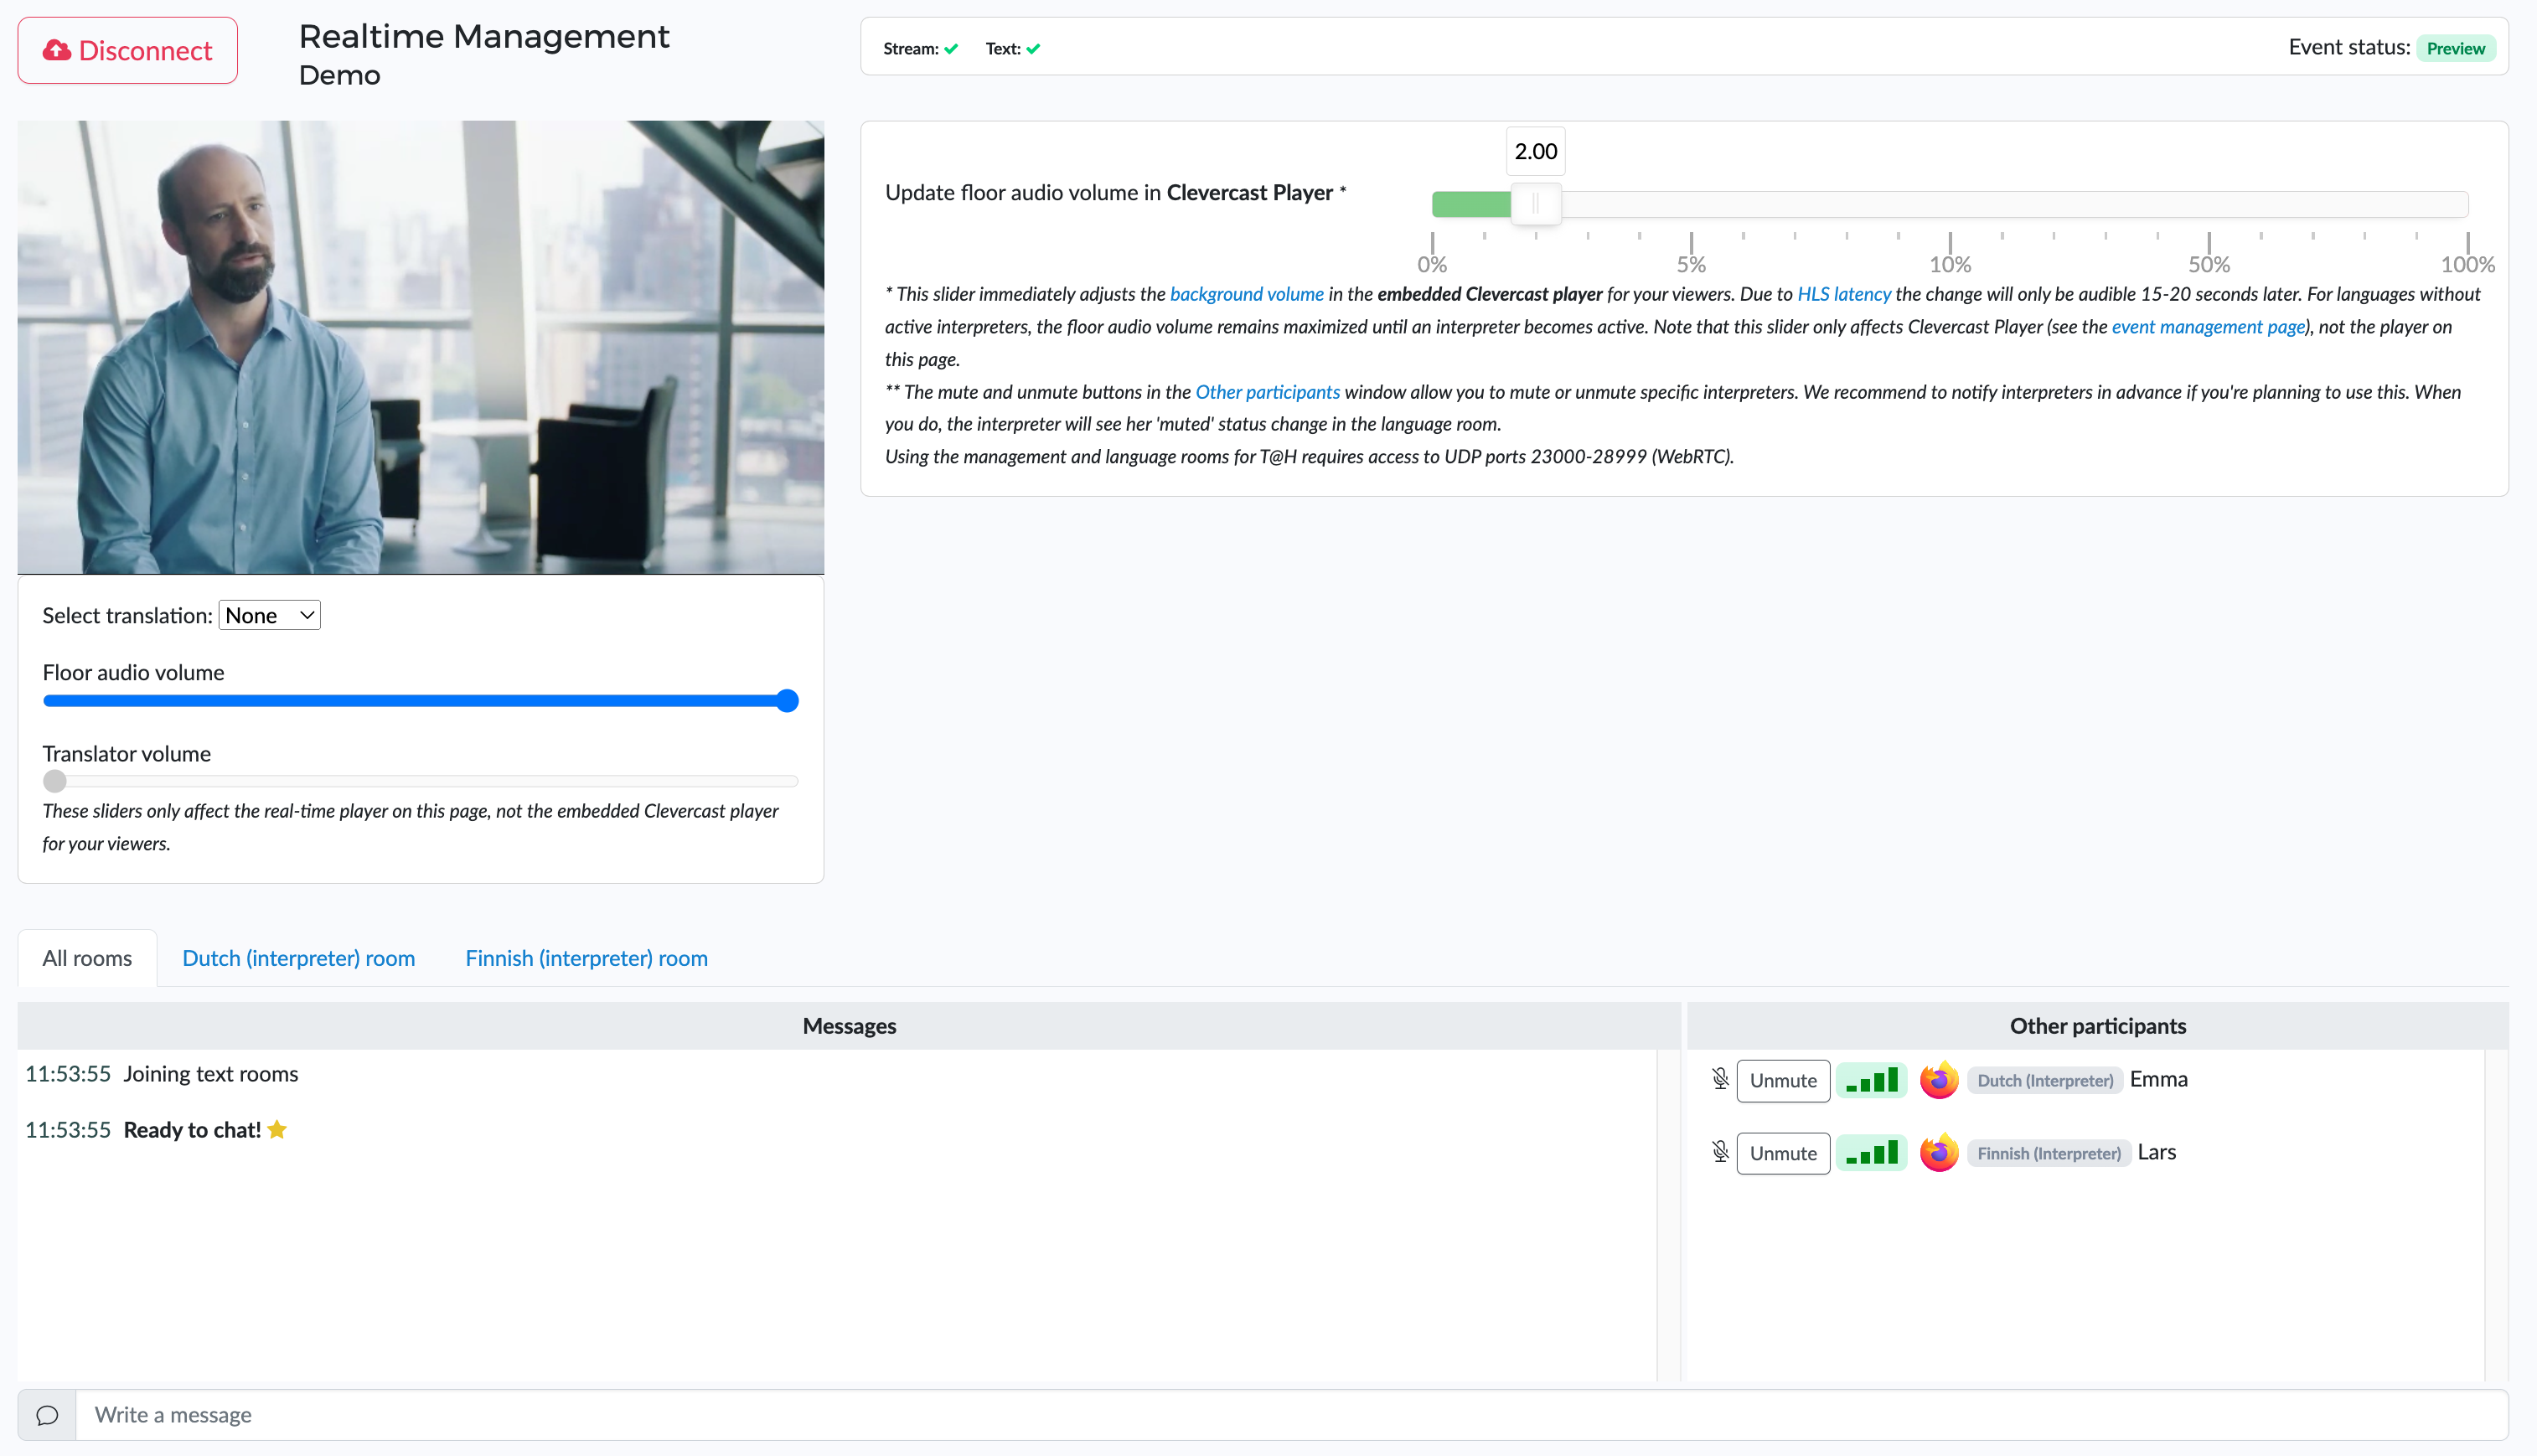
The page consists of 4 parts, which are explained in detail below:
- Left side: the player, which lets you listen in real time to the incoming broadcast and active interpreters. Since this player has no latency, it is ideal to test with interpreters.
- Right side: the slider, which lets you update the floor audio volume (as background) in the translated audio streams (only audible in the embedded player for the end viewers) Note: there is no volume slider in the real-time management room for transcribers if there are only captions set for an event.
- Bottom left side: the rooms available for text chat
- Bottom right side: the list of interpreters and/or transcribers and their current status
Real-time player
On the left side of the page, the real-time player plays the incoming video stream and the translations of interpreters without latency. This differs from the embedded player and the (preview + public) players on the event page, in which the live stream is served with a delay of 16 to 30 seconds due to HLS latency.
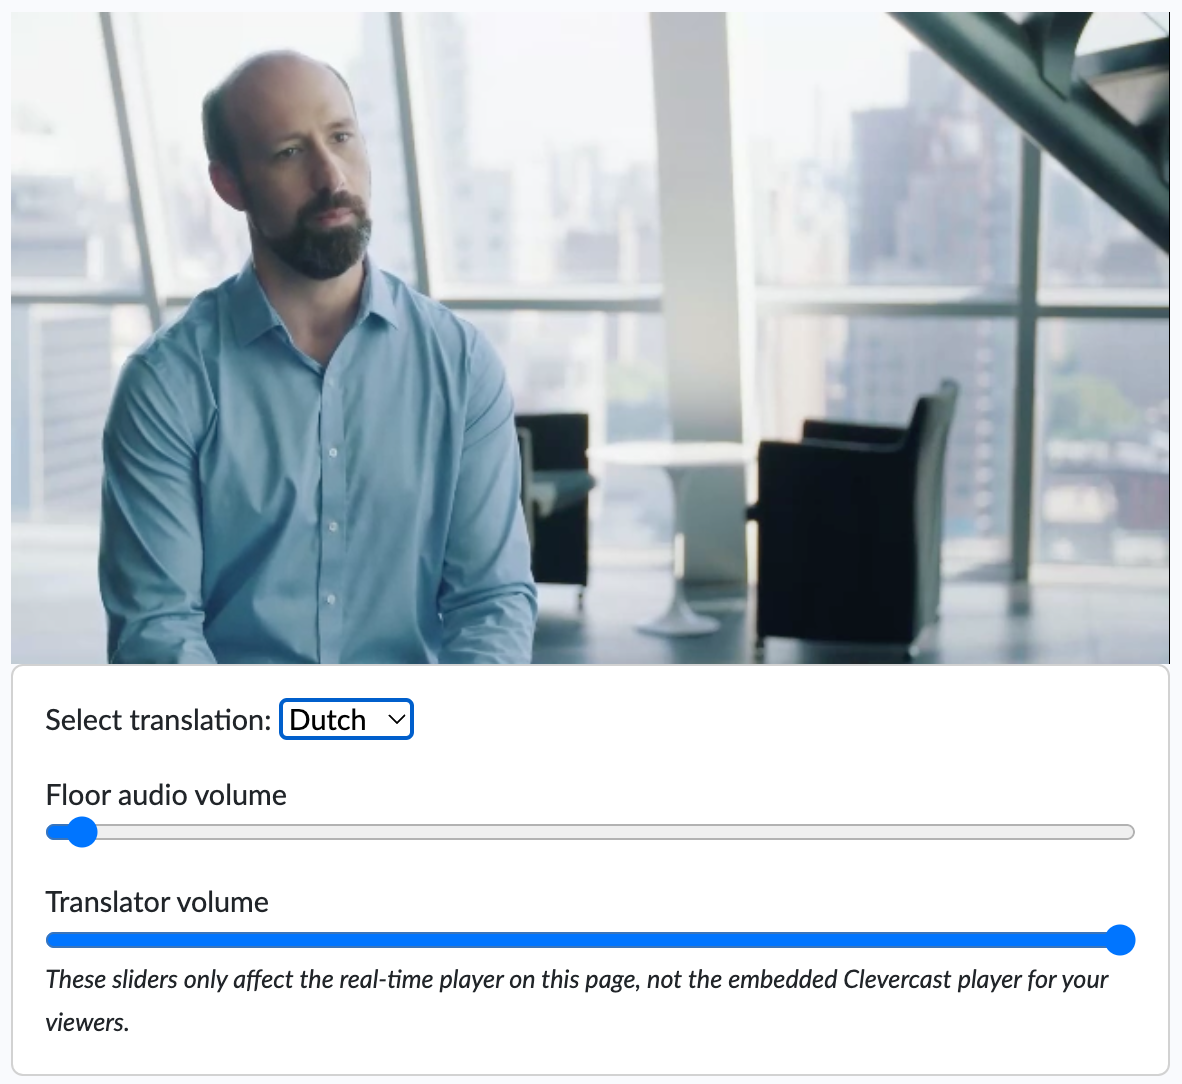
By default you’ll only hear the floor audio. To listen to interpreters, select a translation. The player allows you to listen to both the floor audio and the translation at the same time. The 'Floor audio volume' and 'Translate volume' sliders let you control the volume of both audio sources.
Note: the 'Floor audio volume' and 'Translate volume' sliders have no effect on the embedded player. They only serve for testing and troubleshooting on this page.
Managing the event
Interpretation: updating floor audio background volume in the embedded player
The slider on the right side of the page lets you control the floor audio volume, used as background for T@H languages in the embedded Clevercast player (= heard by your viewers). Drag the slider to 0 to avoid floor audio in the background, or keep it between 1-5% for a low background volume (depends on your broadcast volume).

Adjustments can be made at any time during the live stream. You can also hear the effect in the public + preview players on the event page but not in the real-time player on this page. Keep in mind that the stream in these players is served with HLS latency: so when you change the background volume, you will only hear it in the player about 18 seconds later.
The background volume is only applied while an interpreter is translating. When all interpreters in a certain room are muted, the floor audio volume will be automatically maximized for that language. When an interpreter becomes active again, the latest change is applied.
We recommend to set the background volume to 0 or keep it very low (3% or less): since both the volume of the floor audio and interpreter may differ throughout the live stream, too much background volume will make it difficult to understand the translation. Even more so if multiple interpreters are translating the same language, since they will each produce a different volume (which is very difficult to fine-tune).
Also keep in mind that the selected background volume will also be part of the cloud recording and cannot be removed from it, since Clevercast records the outgoing live stream.
AI captioning & dubbing
Pausing AI captioning
If the event uses AI captions, the 'Pause AI Captioning' button allows you to temporarily stop the AI captioning while you are broadcasting. If you press this button, closed captions will temporarily stop, and no AI minutes will be charged. This is especially useful during testing, so no AI minutes are lost before the actual stream. You are free to start and stop the AI captions at any time, but make sure they are enabled again before the start of your actual event. Thoroughly check whether they are appearing again by using a real-time player (e.g. in the corrector room).
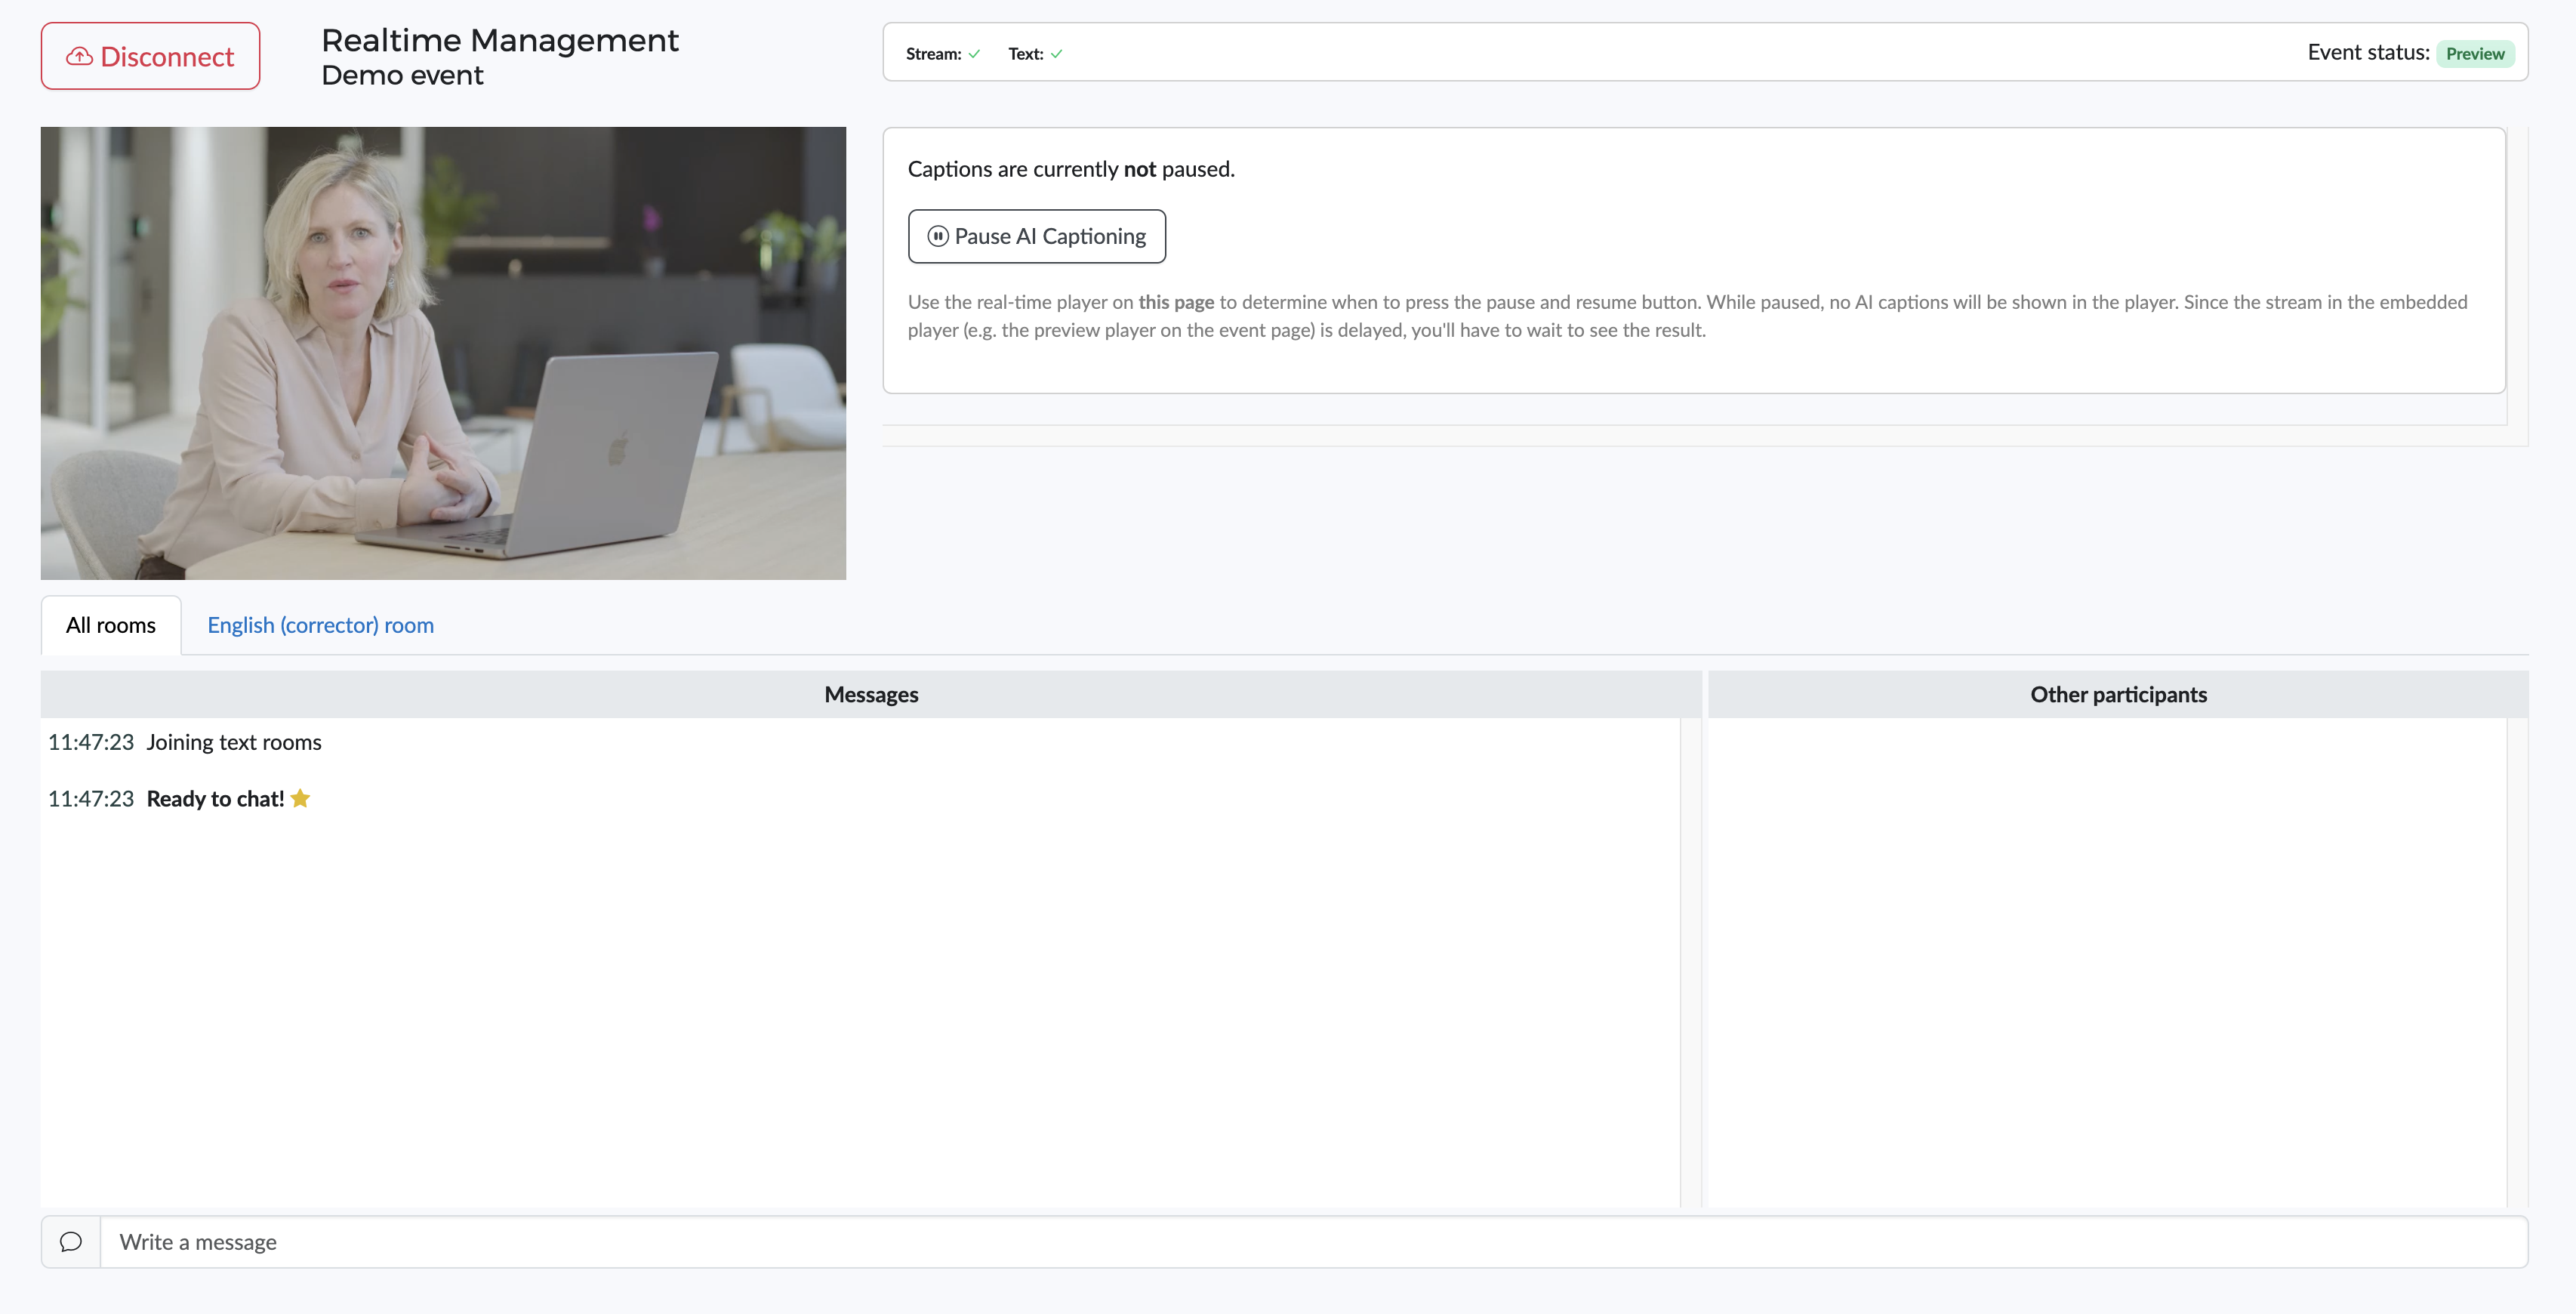
Note that a corrector can start and stop captions too, in the corrector room. This is useful, for example, while music is playing and you don't want the resulting captions in your live stream. This pause button does work differently in the backend, as AI minutes will still be charged.
Changing the active speech-to-text language
If a live streams has speakers in different languages, this lets you select the active speech-to-text language for AI captioning and dubbing. For more info, see our tutorial on the subject.
Text chat
The text chat allows you to communicate with interpreters and transcribers.

The tabs let you choose which rooms to chat with. If you select ‘All rooms’ your messages will be sent to everyone present. If you want to send a message to the interpreters for a particular language, select that specific tab before sending a message.
Important: if you intend to use this during the live stream, you should also use this during your tests (so interpreters and transcribers know how it works).
Additionally, the last 20 messages are kept of your chat history, even when you disconnect and reconnect and as along as the event is not set to Inactive or Ended.

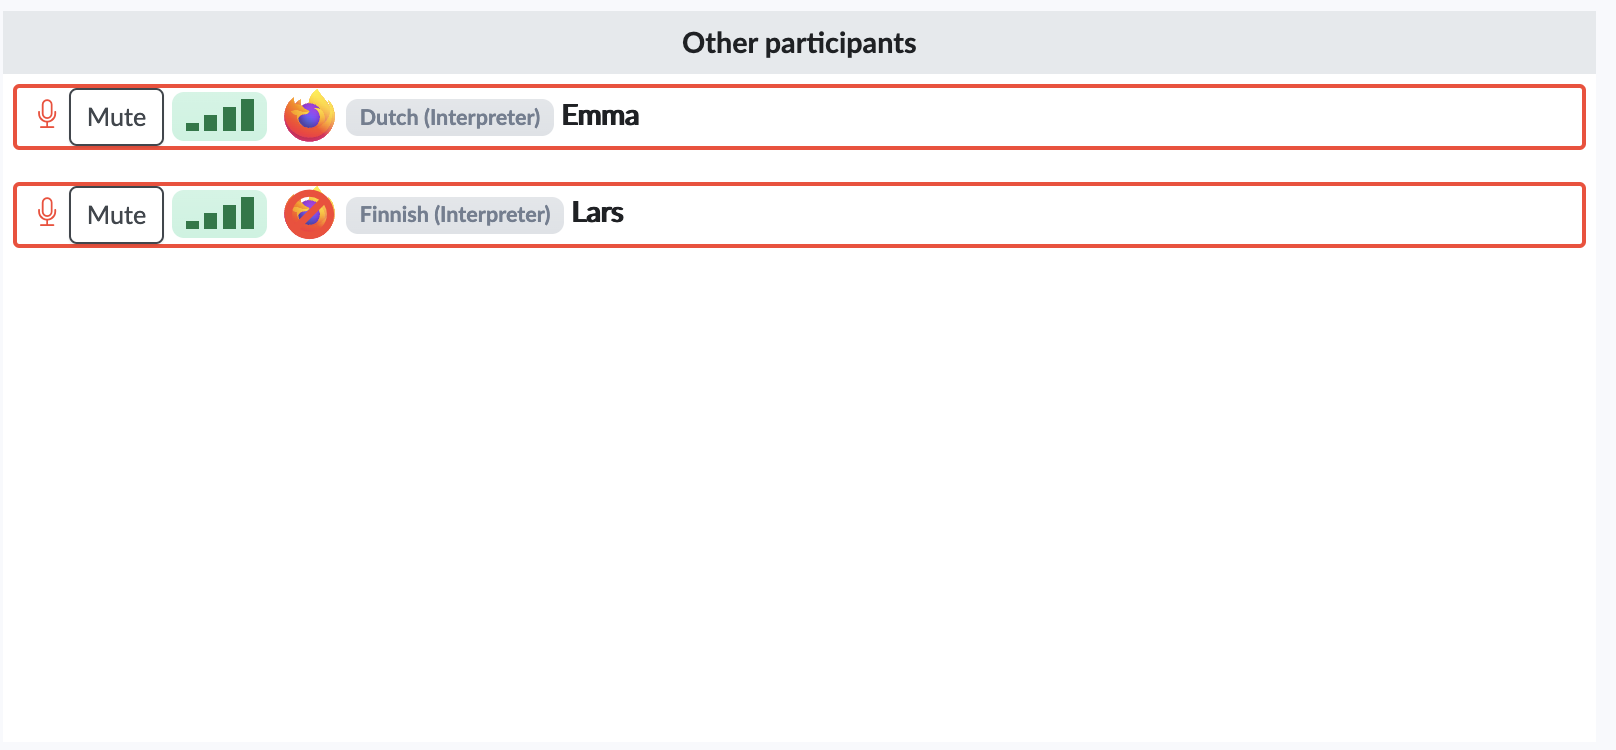
List of participants
The ‘Other participants’ panel on this page lets you see which interpreters and transcribers are inside which language rooms and provides you with info about them.
List of interpreters
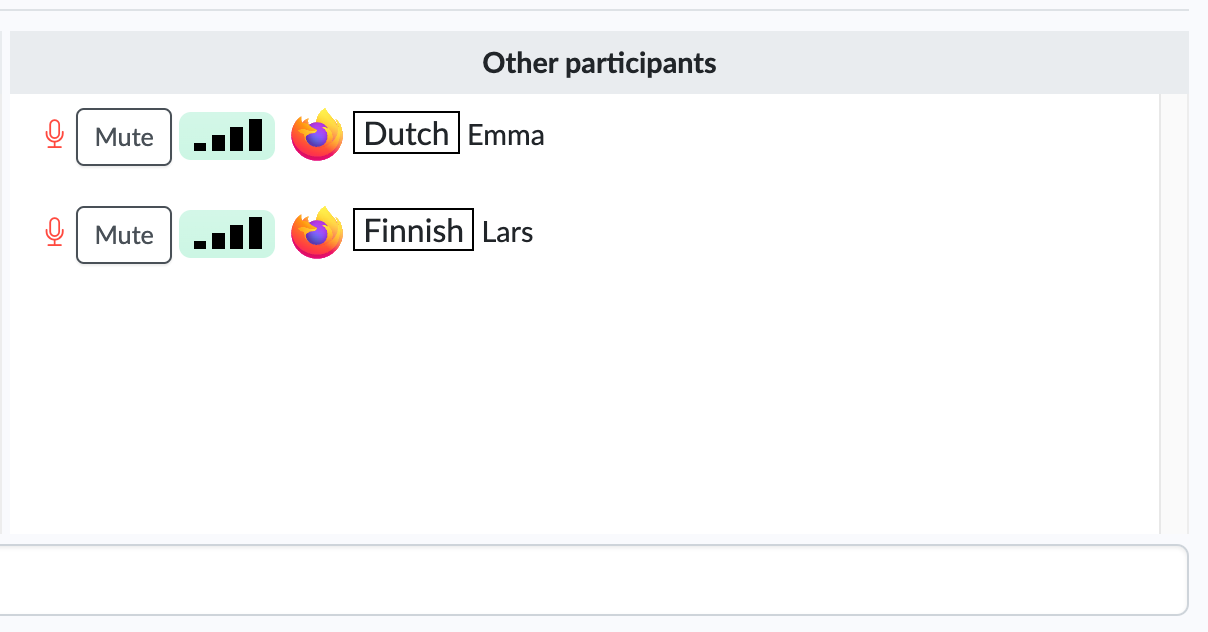
The microphone icon shows whether an interpreter is unmuted (red mic icon) or muted (black crossed out mic icon). The ‘Unmute’ and ‘Mute’ buttons allow you to change their mute status. When you do this, the interpreter will also see their mute status changing inside the language room.
The connection level icon indicates how good an interpreter’s connection is. It is important to check this during your tests. If the icon turns orange or red, we recommend trying to find an alternative connection or interpreter if possible. An orange connection level does not necessarily imply that the translation can’t be understood properly. But it does mean that there is packet loss or jitter, which may result in audio quality issues.
The Firefox icon shows whether an interpreter is using the Firefox browser. If he or she isn’t, the icon is crossed out. Please note that, even though Google Chrome fully supports WebRTC and should also work, we recommend using Firefox for a number of reasons.
When interpreters are speaking (and unmuted), they receive a red grid around their details.
List of transcribers

The participant list of the transcribers is different from the one of the interpreters. The participant information includes the name of the transcriber and his or her transcription language.