Creating and managing AI events
This section is part of the AI Live Streaming Manual.
In Clevercast, the name Event is used to denote a live stream and its metadata and features. To create and manage Events, go to the Live > Events section in the top menu.
Creating an AI event
Go to the 'Live' > 'Events' section of the top menu. In the left-side menu, you will see two ways to create an AI event:
- 'Create AI Multilingual Event': recommended for AI events. This will start the AI event wizard. When you complete the wizard, all important aspects of the event have been configured.
- 'Create Multilingual Event': use this if you want to combine AI captions and/or speech with other forms of multilingual live streaming. For example, you can use it to send a broadcast with multiple audio tracks and add AI captions to it. When you use this menu, you'll need to add the AI languages after the event is created. For more info, see the Enterprise manual.
In this guide, we assume you are using the wizard. In that case, all important aspects of your AI event will be configured when you complete the wizard.
Create AI Multilingual Event wizard
1 Broadcast settings
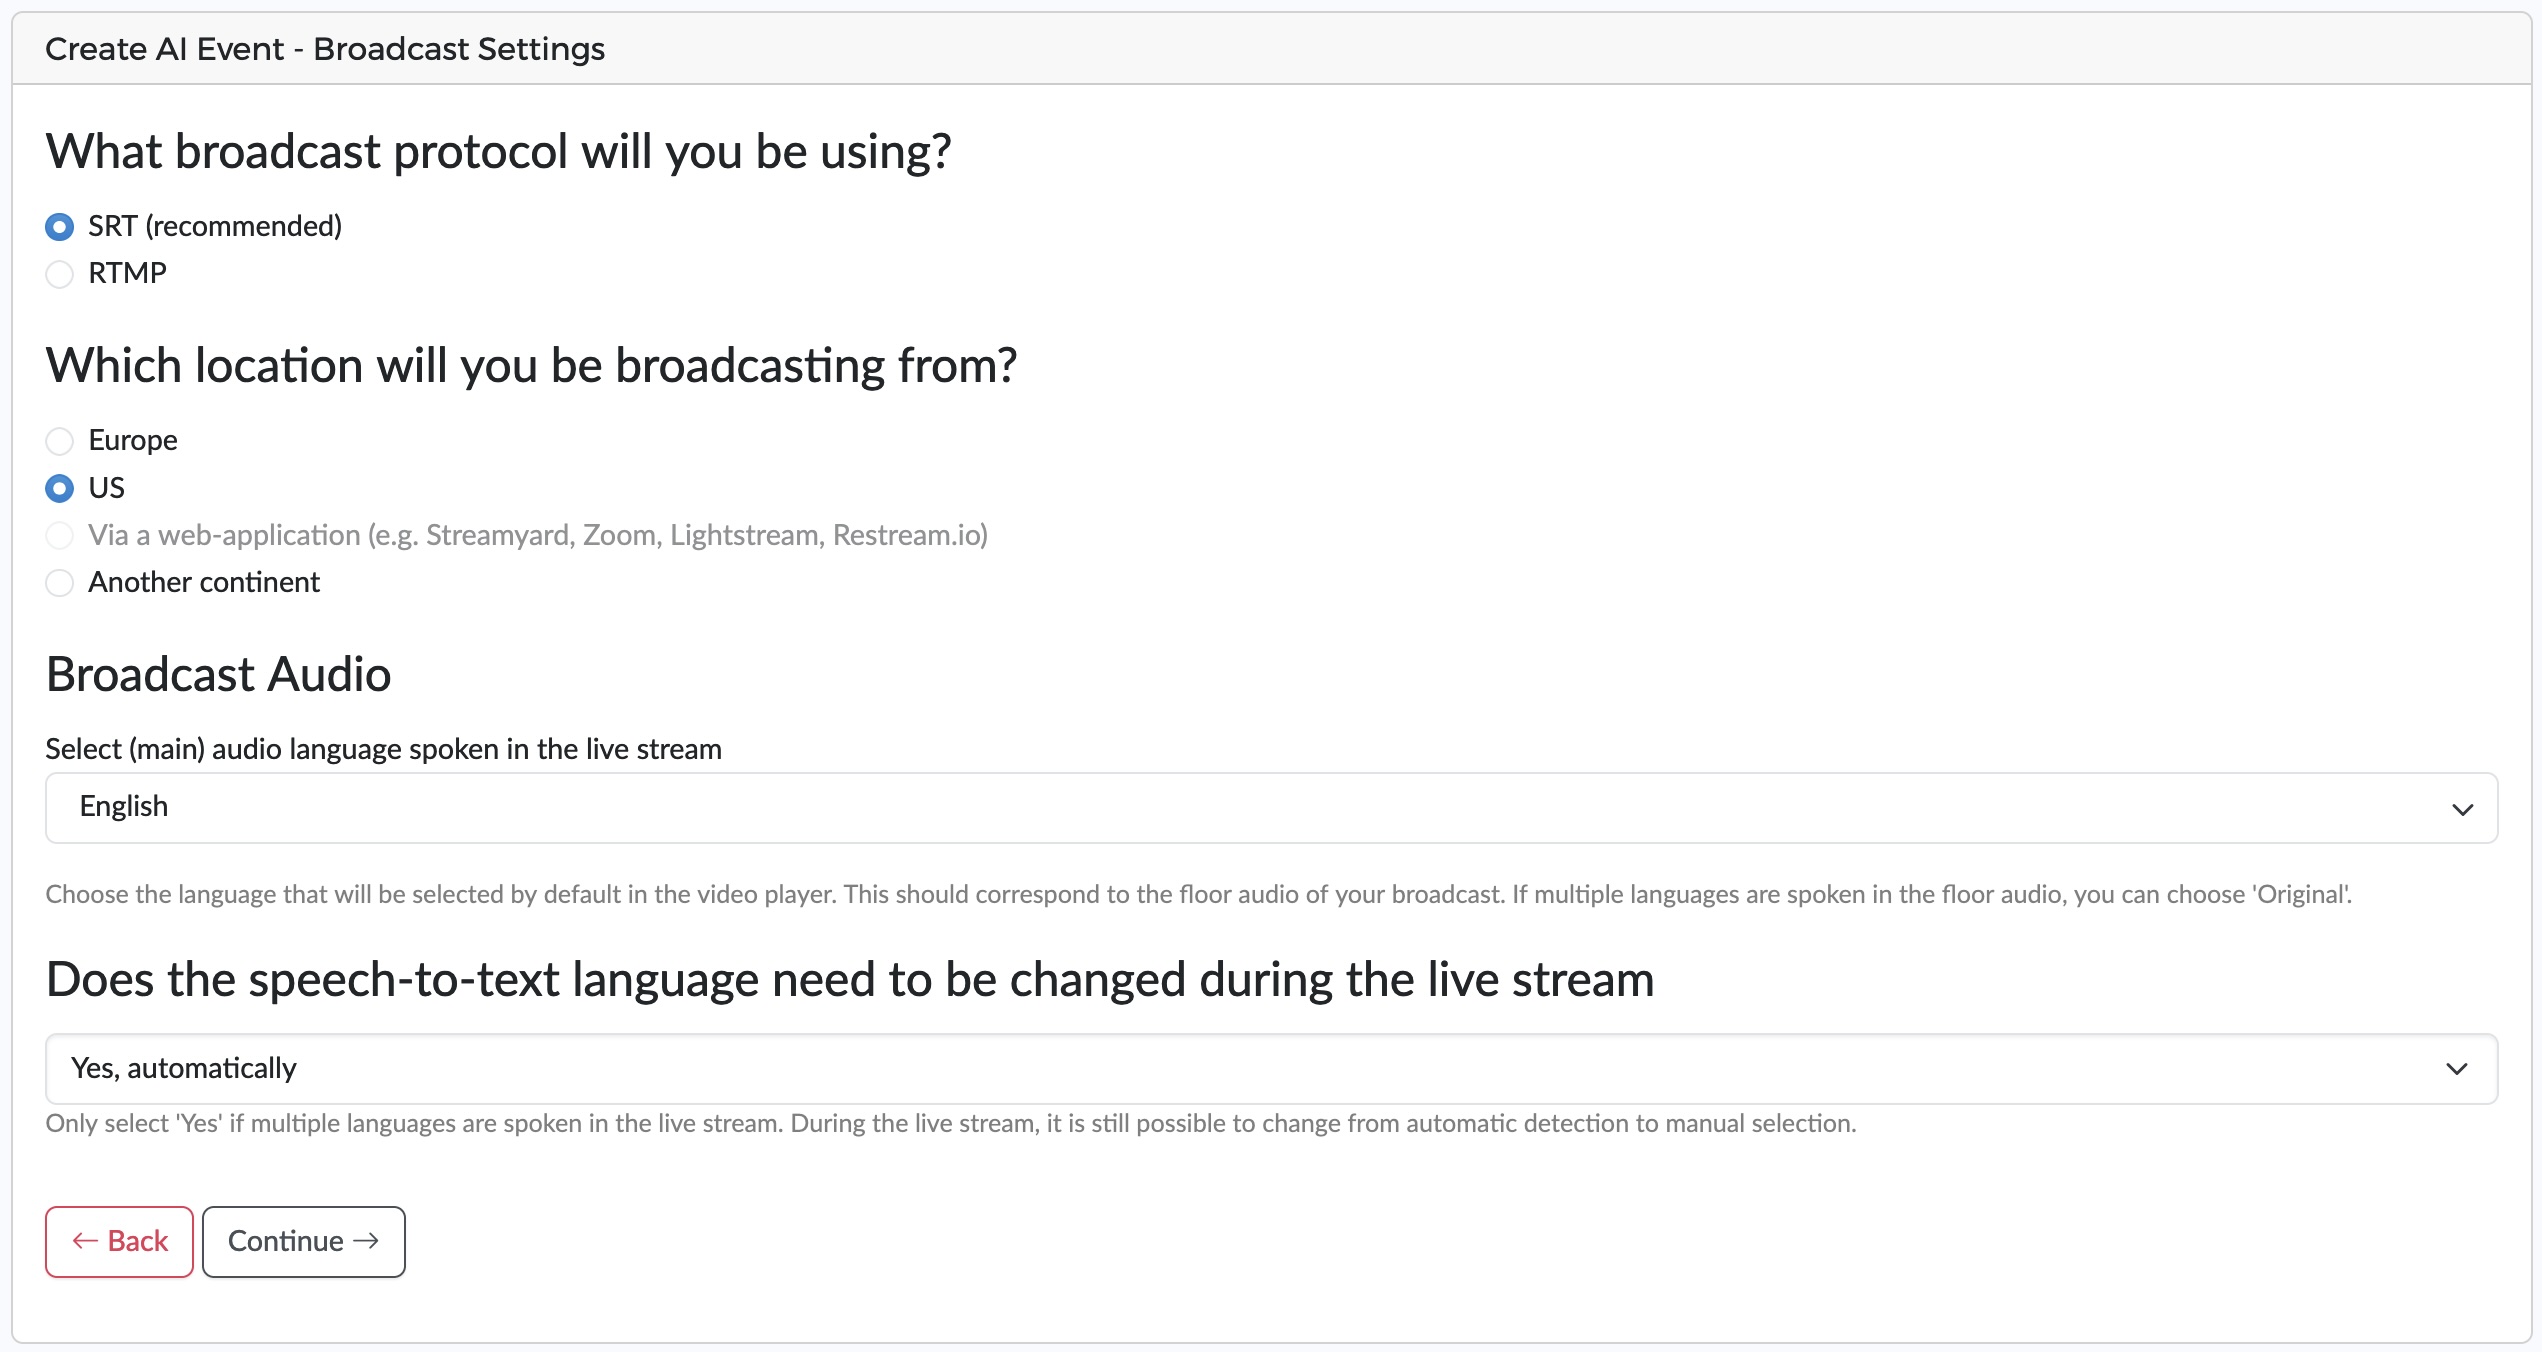
In the first step, you provide information about the broadcast you will be sending for this event.
- 'Which broadcast protocol are you using?'
- 'From which location is your broadcast sent?'
- 'What language is (mainly) spoken in your live stream?' This will be set as the (default) speech-to-text language.
- 'Does the speech-to-text language need to be changed during the live stream?'
- Select 'No' if only one language will be spoken in your live broadcast.
- Select 'Yes, manually' if you're not sure about how many languages will be spoken and/or someone can manually select the language that is spoken (when it changes).
- Select 'Yes, automatically' if you want Clevercast to automatically detect the languages that will be spoken. Don't select this if a single language will be spoken in your broadcast, since automatic detection may get it wrong (which would lead to unintelligible captions and speech until the correct language is re-detected and applied).
During the livestream it is still possible to change from manual to automatic (and vice versa), as long as you haven't selected 'No'.
Manual selection is slightly faster and more reliable. Automatic detection waits until a number of words have been spoken in a different language before changing the speech-to-text language (4-8 seconds). As a result, a limited number of closed captions and/or speech translations may be dropped after the language change. See 'Managing AI live streams in which multiple languages are spoken' for more info on this subject.
2 AI languages and settings
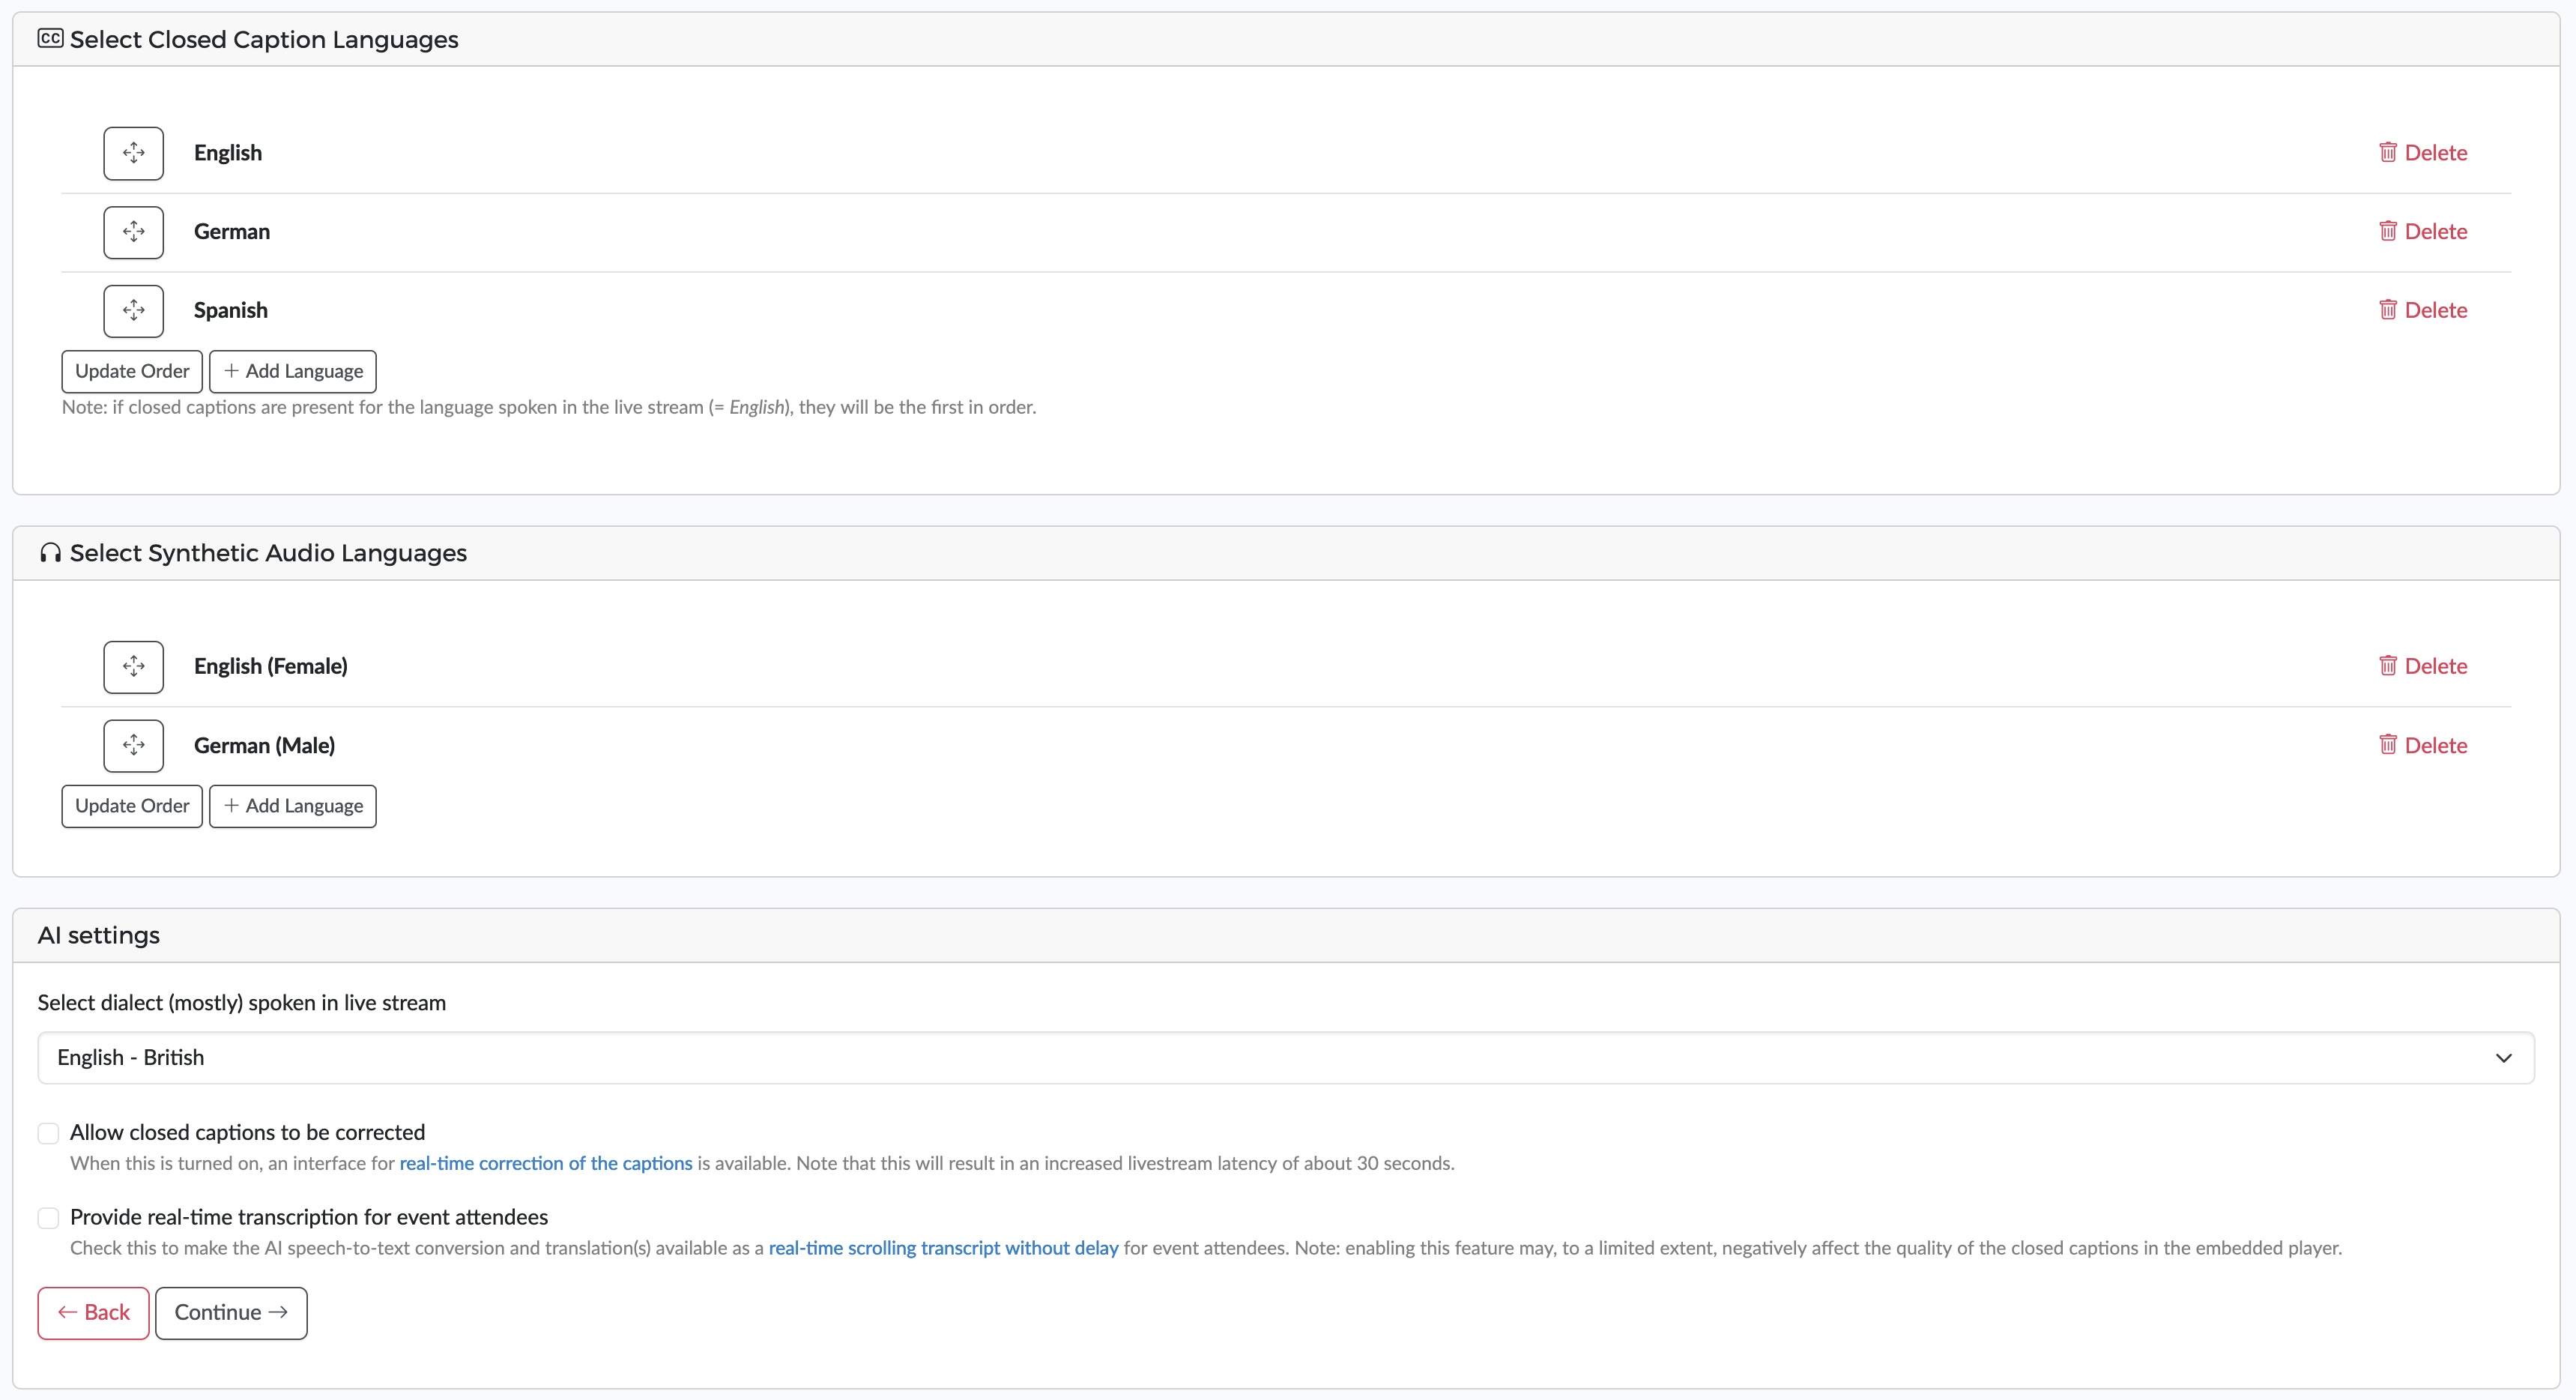
In the second step, you select the captions and speech languages to be generated by AI and added to the live stream.
Additionally, there are settings related to the way the captions and speech translations are generated and provided.
- If English is the (main) broadcasted language, you will be asked to select the dialect used by the majority of the speakers: British, American or Australian. This can improve speech-to-text conversion somewhat, but plays only a minor role.
- 'Allow captions to be corrected': When this is turned on, an interface for real-time correction of the captions is available. Note that this will result in an increased latency of about 30 seconds.
- 'Provide real-time transcription for event attendees': turn this on to make the AI speech-to-text conversion and translation(s) available as a real-time scrolling transcript without delay.
- 'Provide real-time audio translations for event attendees': turn this on to make AI speech translations available in real-time (audio and/or video player).
See the Real-time transcription and translation guide for more info.
In the example above, three closed captions and two speech translations are added to the live stream.
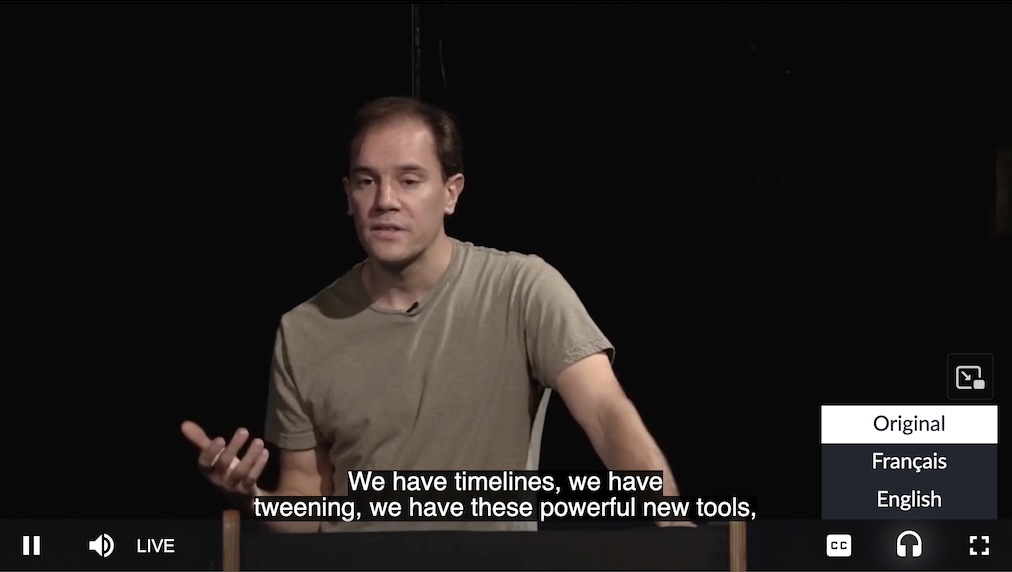
Note: in the example, the default speech-to-text language (English) is also included as an AI speech translation language. In such case, 'Original' is used as the first audio language, which contains the broadcasted audio stream (= the voices of the speakers, in the different languages).
Important: if multiple languages are spoken in the live stream, make sure to add all of them as AI caption and/or audio languages. If you forget a language, no speech-to-text conversion will be available for it (leading to no or incorrect captions and speech translations).
3 Event details
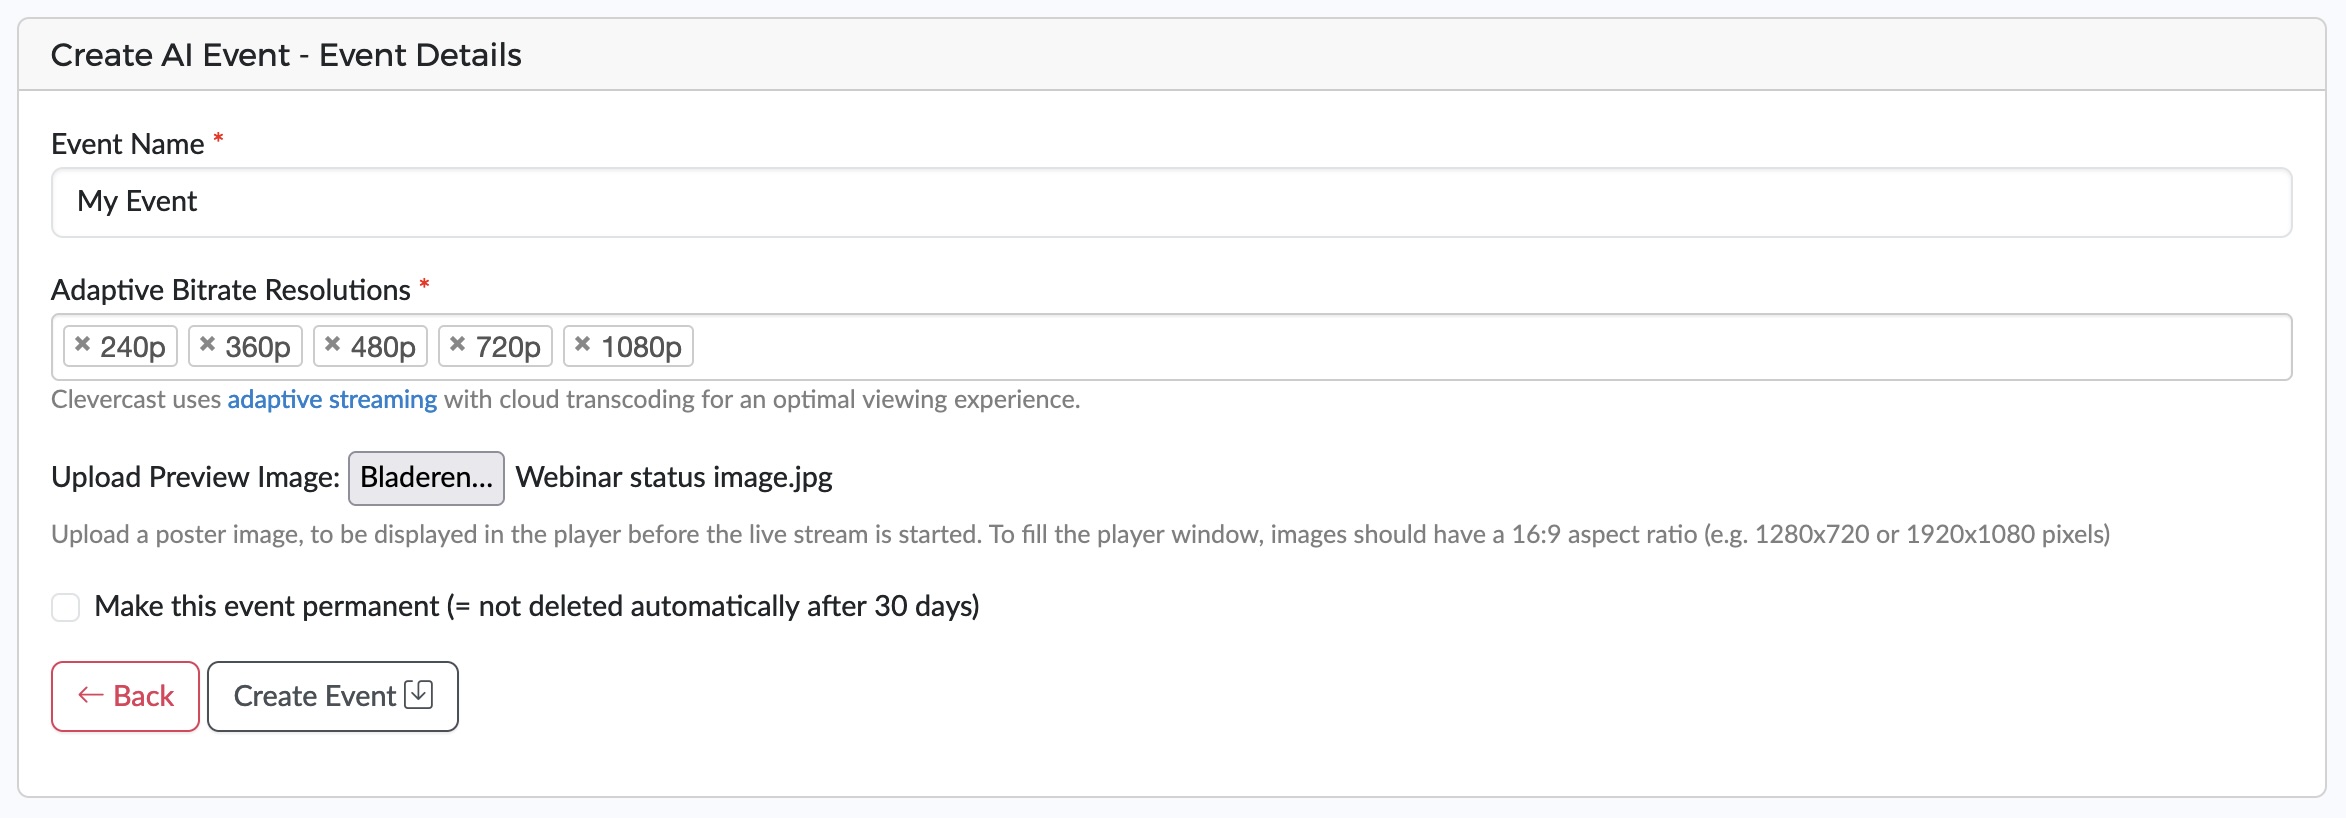
In the third step, you can configure a number of live stream details.
- 'Event name': identifies the event in Clevercast. Set a descriptive name that isn't too long.
- 'Adaptive Bitrate Resolutions': the resolutions in which your broadcast will be transcoded in the cloud and therefore will be used for adaptive bitrate streaming.
- 'Upload Preview Image': lets you upload a poster image that will be shown in the player until your live stream starts.
- 'Make this event permanent': you can check this to re-use the same configuration for multiple live streams
When you press “Create Event,” Clevercast will create and configure the event.
4 Create vocabulary
After the event is created, you can start a vocabulary for it. Clevercast uses generative AI to extract names, abbreviations, technical terms, and the like from a given text and translates them into the selected languages.
Simply copy some text, paste it into the edit box, and press 'Continue'.
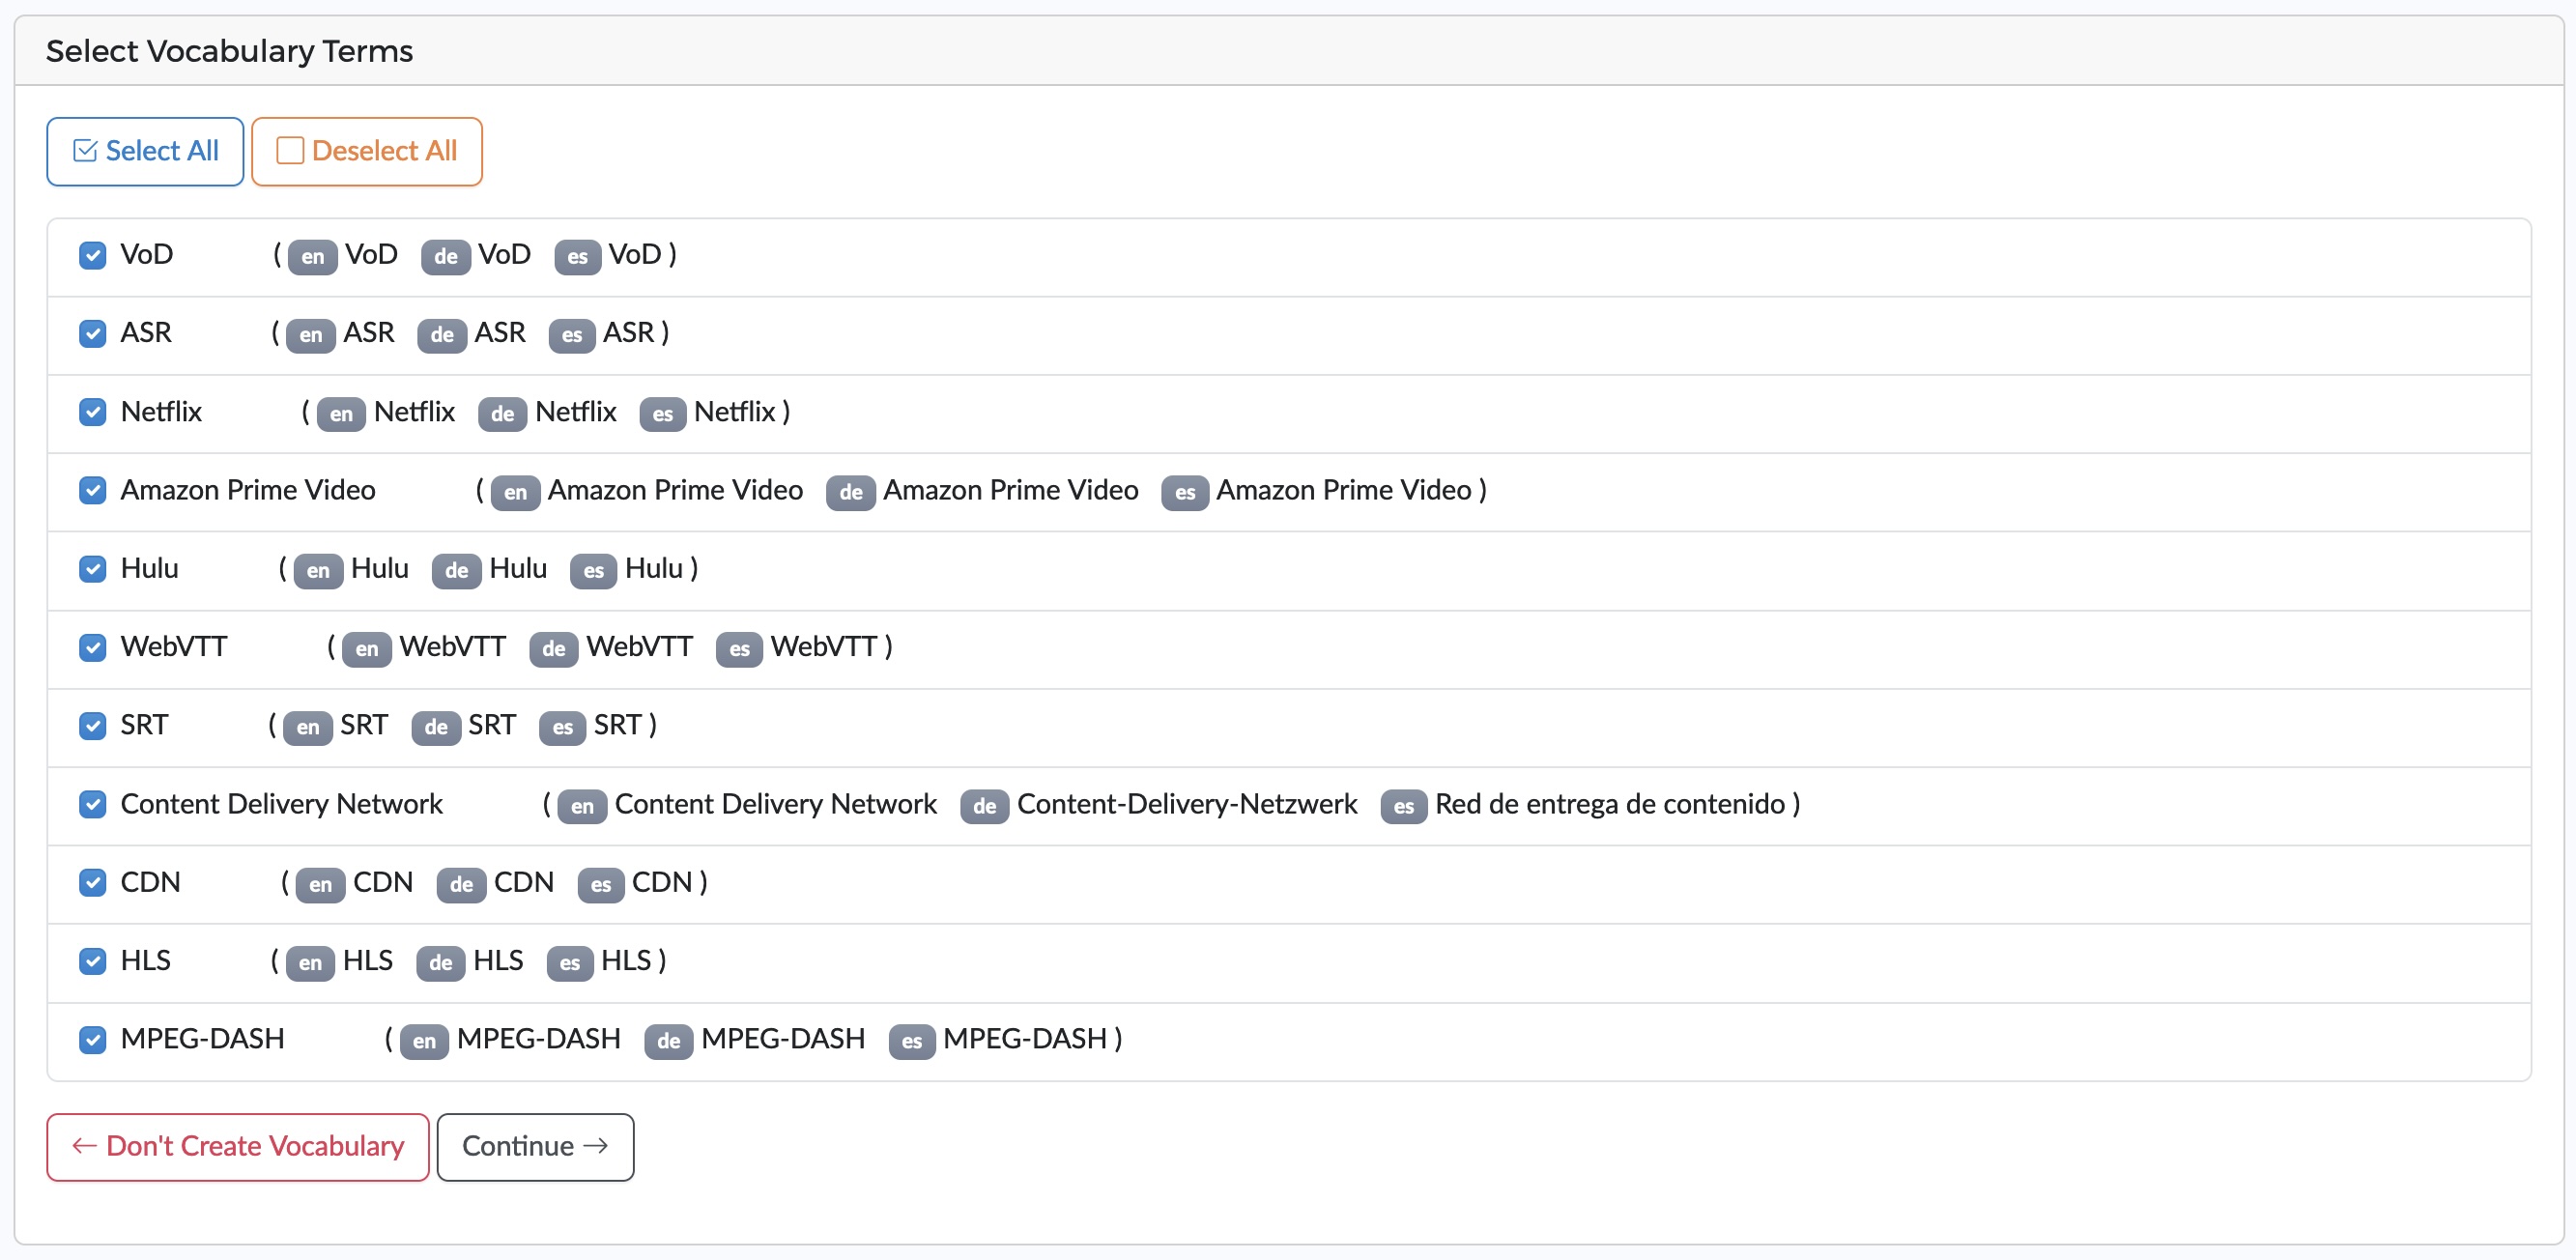
5 Select vocabulary terms
The last step shows the translated terms, before adding them to the vocabulary. This allows you to choose which terms to (not) add. Press 'Continue' to add the terms and complete the wizard. You will then be redirected to the event page.
Once the wizard is complete, you can edit the vocabulary and add new terms, both via generative AI and manually, on the 'Caption Languages' tab of the event page.
Event and Broadcast status
Event status
An Event always has a certain status, which determines if you can start broadcasting, what your viewers see in the embedded player, if the corrector and management room are accessible and when a cloud recording is started/stopped.
The event page always displays the current event status, which can be:
- Inactive: The event is not ready to receive a broadcast. The embedded player displays the Preview image or message and (optionally) a countdown timer.
- Preview: The event is ready to receive a broadcast. But the stream is only visible to Clevercast admins in the preview player, not to viewers in the embedded player. They will keep seeing the Preview image or message.
- Started: When you press the ‘Start event‘ button, the embedded player detects this and shows the live stream to your viewers.
- Paused: The event continues to receive a broadcast and display the stream in the preview player. But your viewers now see the Paused image or message.
- Ended: Clevercast stops processing the live stream. Your viewers see Ended image or message.
So to receive a broadcast, the event must have one of the following (active) statuses: Preview, Started or Paused. These statuses are also needed to use the correction room and management room.
A cloud recording is automatically started when you set the event status to Started. When you change the status (to any other status), the cloud recording stops. When you start the event again, a new cloud recording is started.
The event appearance tab lets you set a separate image (or message) for each status, or a single general image for all statuses. It also lets you set a countdown timer (until the scheduled start time of your event) to be displayed before your event. When the event is started, the image, message and timer automatically disappear.
Note: this also applies if you have a webinar plan. In that case, the embedded player is the player that participants see on the webinar page.
Broadcast status
The broadcast status is also displayed on the event page.
When a broadcast is being received by Clevercast, this is set to Started. Note that while the status is Inactive or Ended, the broadcast status will always be Stopped (no broadcast can be received).
NOTE: when Clevercast receives a broadcast (and thus renders a stream) AI hours and live processing hours are being used no matter which status is set. To avoid AI hours to be used in Preview, you can temporarily turn them off in the real-time management room.
The Event page
After creating an event, you will be redirected to the event page. The event page is where you manage a live stream. It lets you configure all aspects of the live stream, get the input data for your encoder, start and stop playback in the video player, determine the look and feel, and troubleshoot issues.
The event page consists of a number of tabs, which allow you to manage the different aspect of a live stream. Which tabs and settings are available depends on the broadcast protocol and the features of your plan.
The functionality of each tab is explained below.
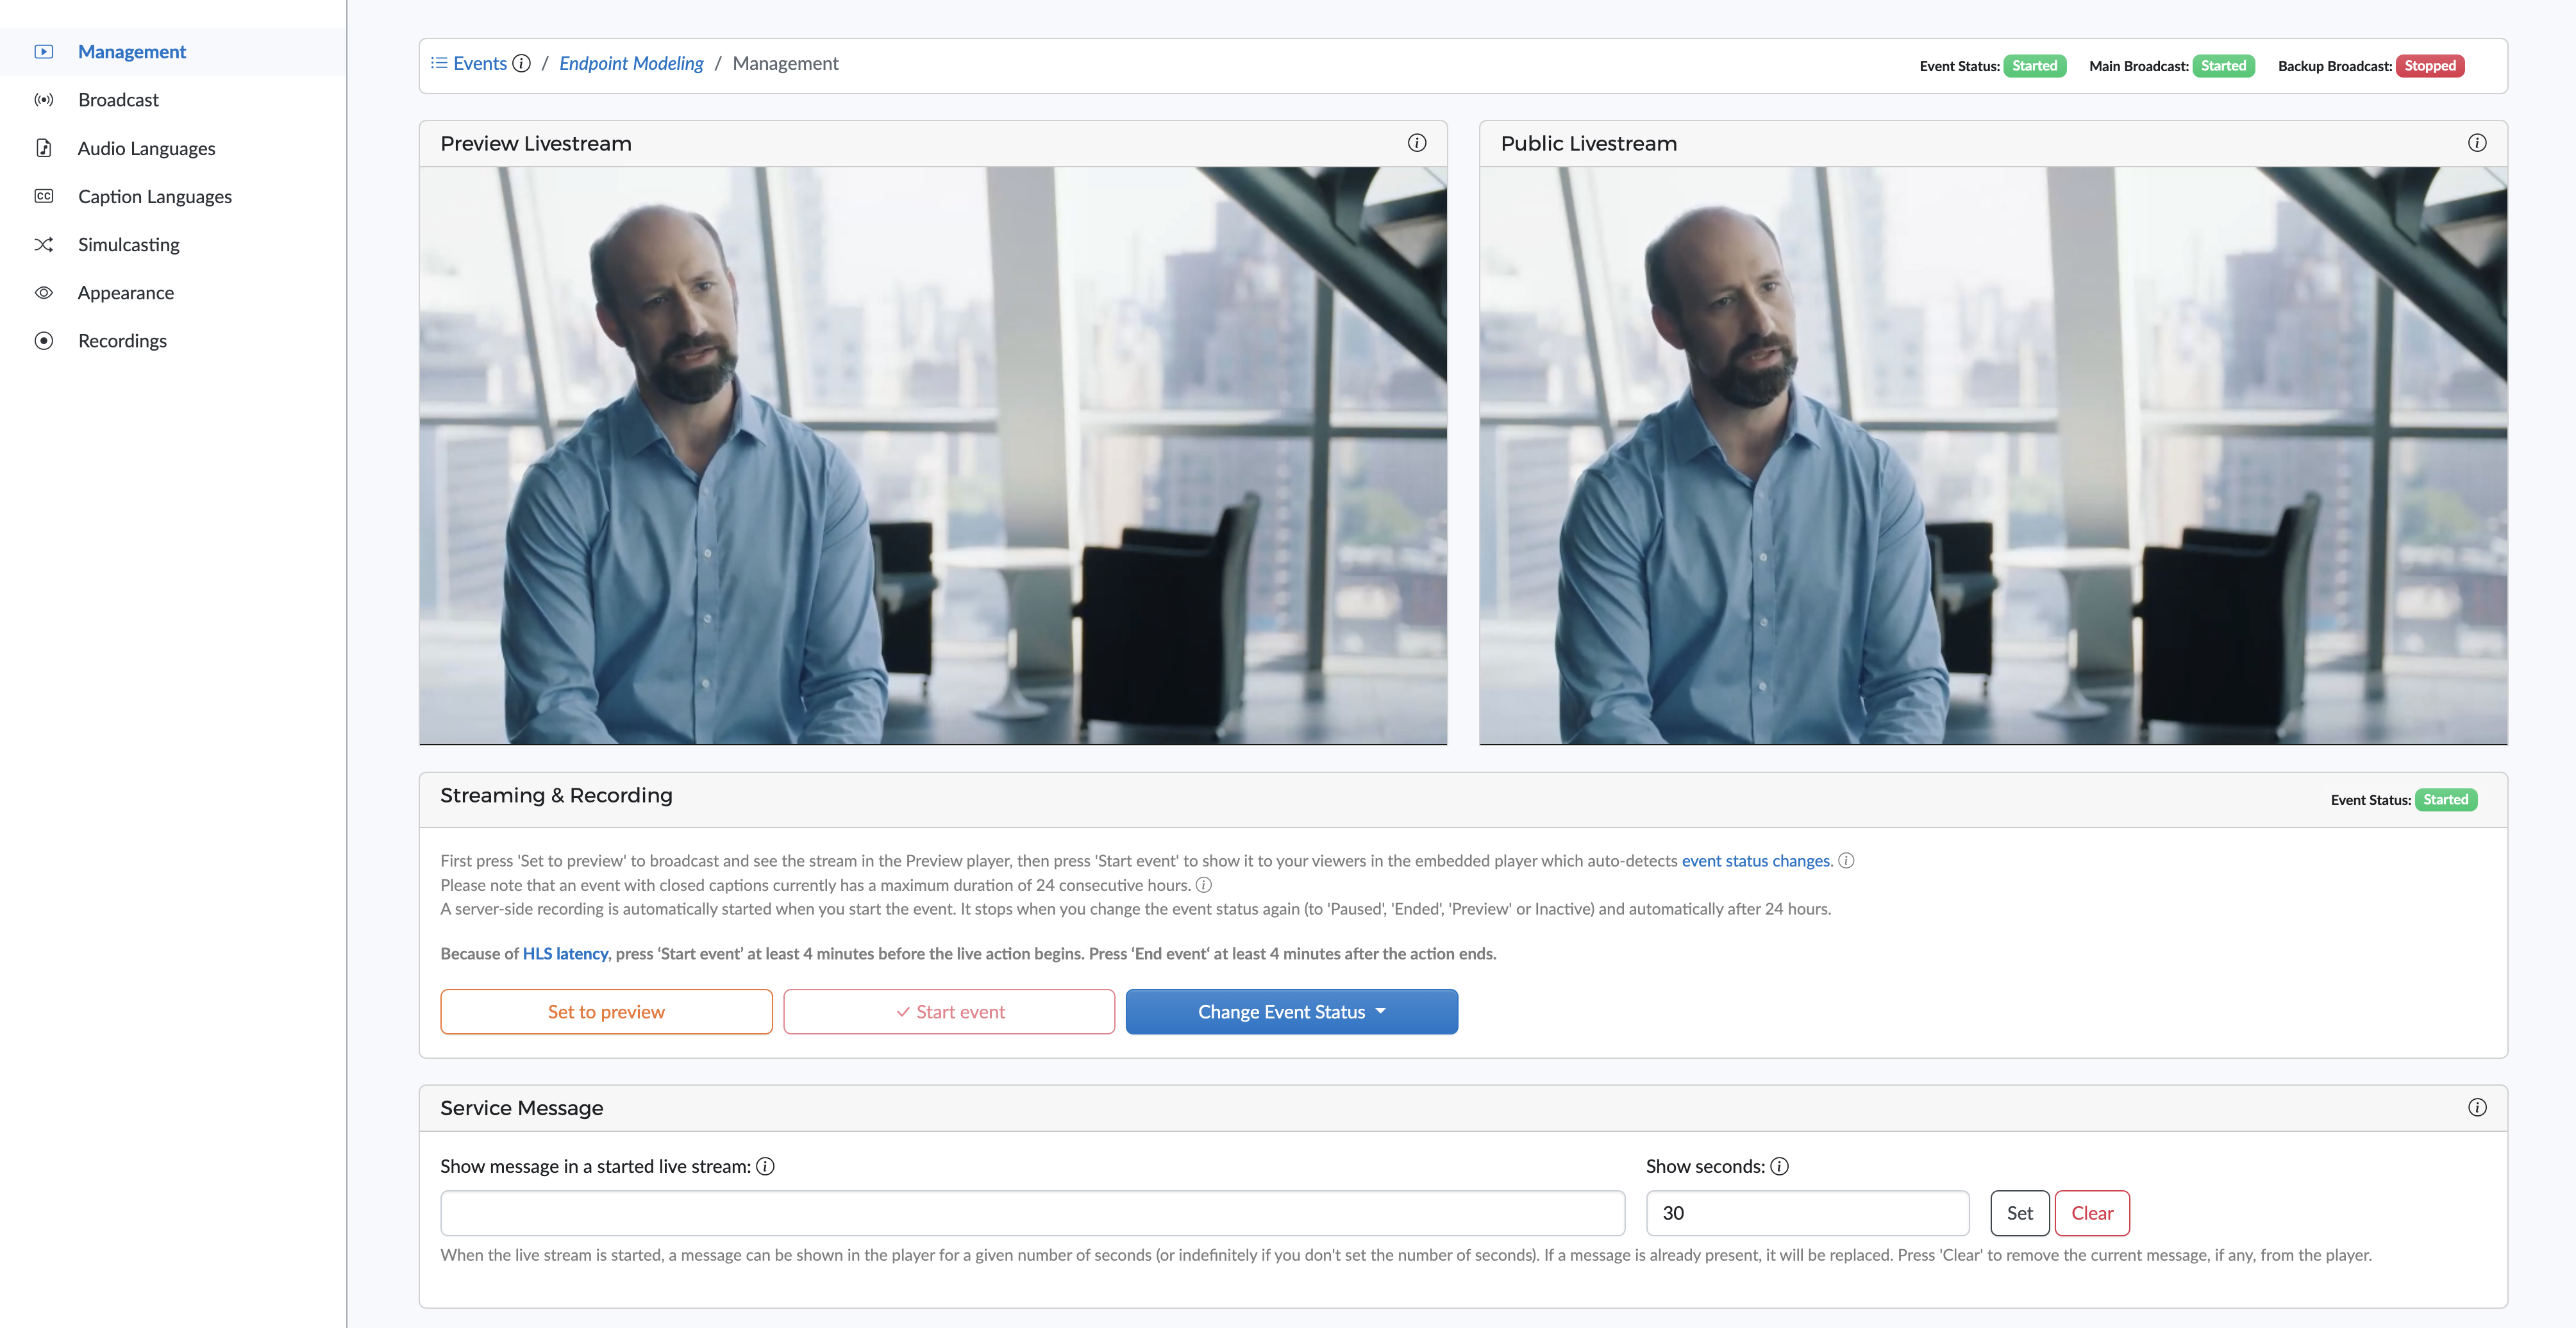
Management
The Management tab lets you change the event status, watch the video stream, show messages in the player during the live stream and copy the embed code.
- The Set to preview, Start event and Change Event Status buttons allow you to change the status of the event. Be aware that a status change may take some time.
- The Preview player lets you see the live stream when a broadcast is received by Clevercast and the event is not yet
Started. Note: for AI Events, the status must be set toPreviewbefore a broadcast can be received. - The Public player behaves in the same way as the embedded player as shown to your viewers. This player automatically detects the status changes of your event and acts accordingly.
- The Service Message can be used to show text messages in the embedded player while the event status is
Started. You decide how long the message is displayed in the player. - The Embed code can be copied to your website or third-party platform. The embedded player will behave in the same way as the public player, including status changes and failover to the backup broadcast. For more info, see our guide on embedding and configuring the player.
You can update the Name, Description, Resolutions, Tags and Is Permanent Event settings, which have been set by the wizard. There is also a Replace ended event by VoD item setting, which allows you to select a VoD item that will be automatically shown in the (embedded) player after the event ends. See our tutorial for more info.
Note: the streams on this page, both in the preview and public player, have the same latency as the stream in the embedded player. To see the incoming stream without latency, go to the Real-time Management page.
Broadcast
The Broadcast tab contains the settings for your encoder or web application (e.g. Streamyard) to configure the broadcast to Clevercast.
Please follow our broadcast guidelines as much as possible (see also this non-exhaustive list with example configurations for single language streams).
Important: since Clevercast is adding AI captions and/or speech, the live stream will have a framerate of 25 fps and keyframe interval of 2 seconds, no matter what the framerate of your broadcast is (this limitation currently applies). Therefore, we strongly recommend to broadcast with a framerate of 25 fps and keyframe interval of 2 seconds. If you use a higher framerate and not all frames are delivered to Clevercast in time (eg. network connections, insufficient bandwidth at the event location) this may cause the floor audio to go shortly out of sync.
Troubleshooting tip for new users: when your broadcast doesn't appear, always make sure that the event status is not set to Inactive or Ended.
For most broadcast protocols, Clevercast supports a fully redundant setup, which allows you to broadcast to a main and backup server on different geographical locations. Use the settings in the Backup Broadcast panel to send the same broadcast to both servers simultaneously. Clevercast player will detect if the main stream is down and automatically failover to the backup stream, without your viewers having to refresh the page.
Audio languages
The settings panel
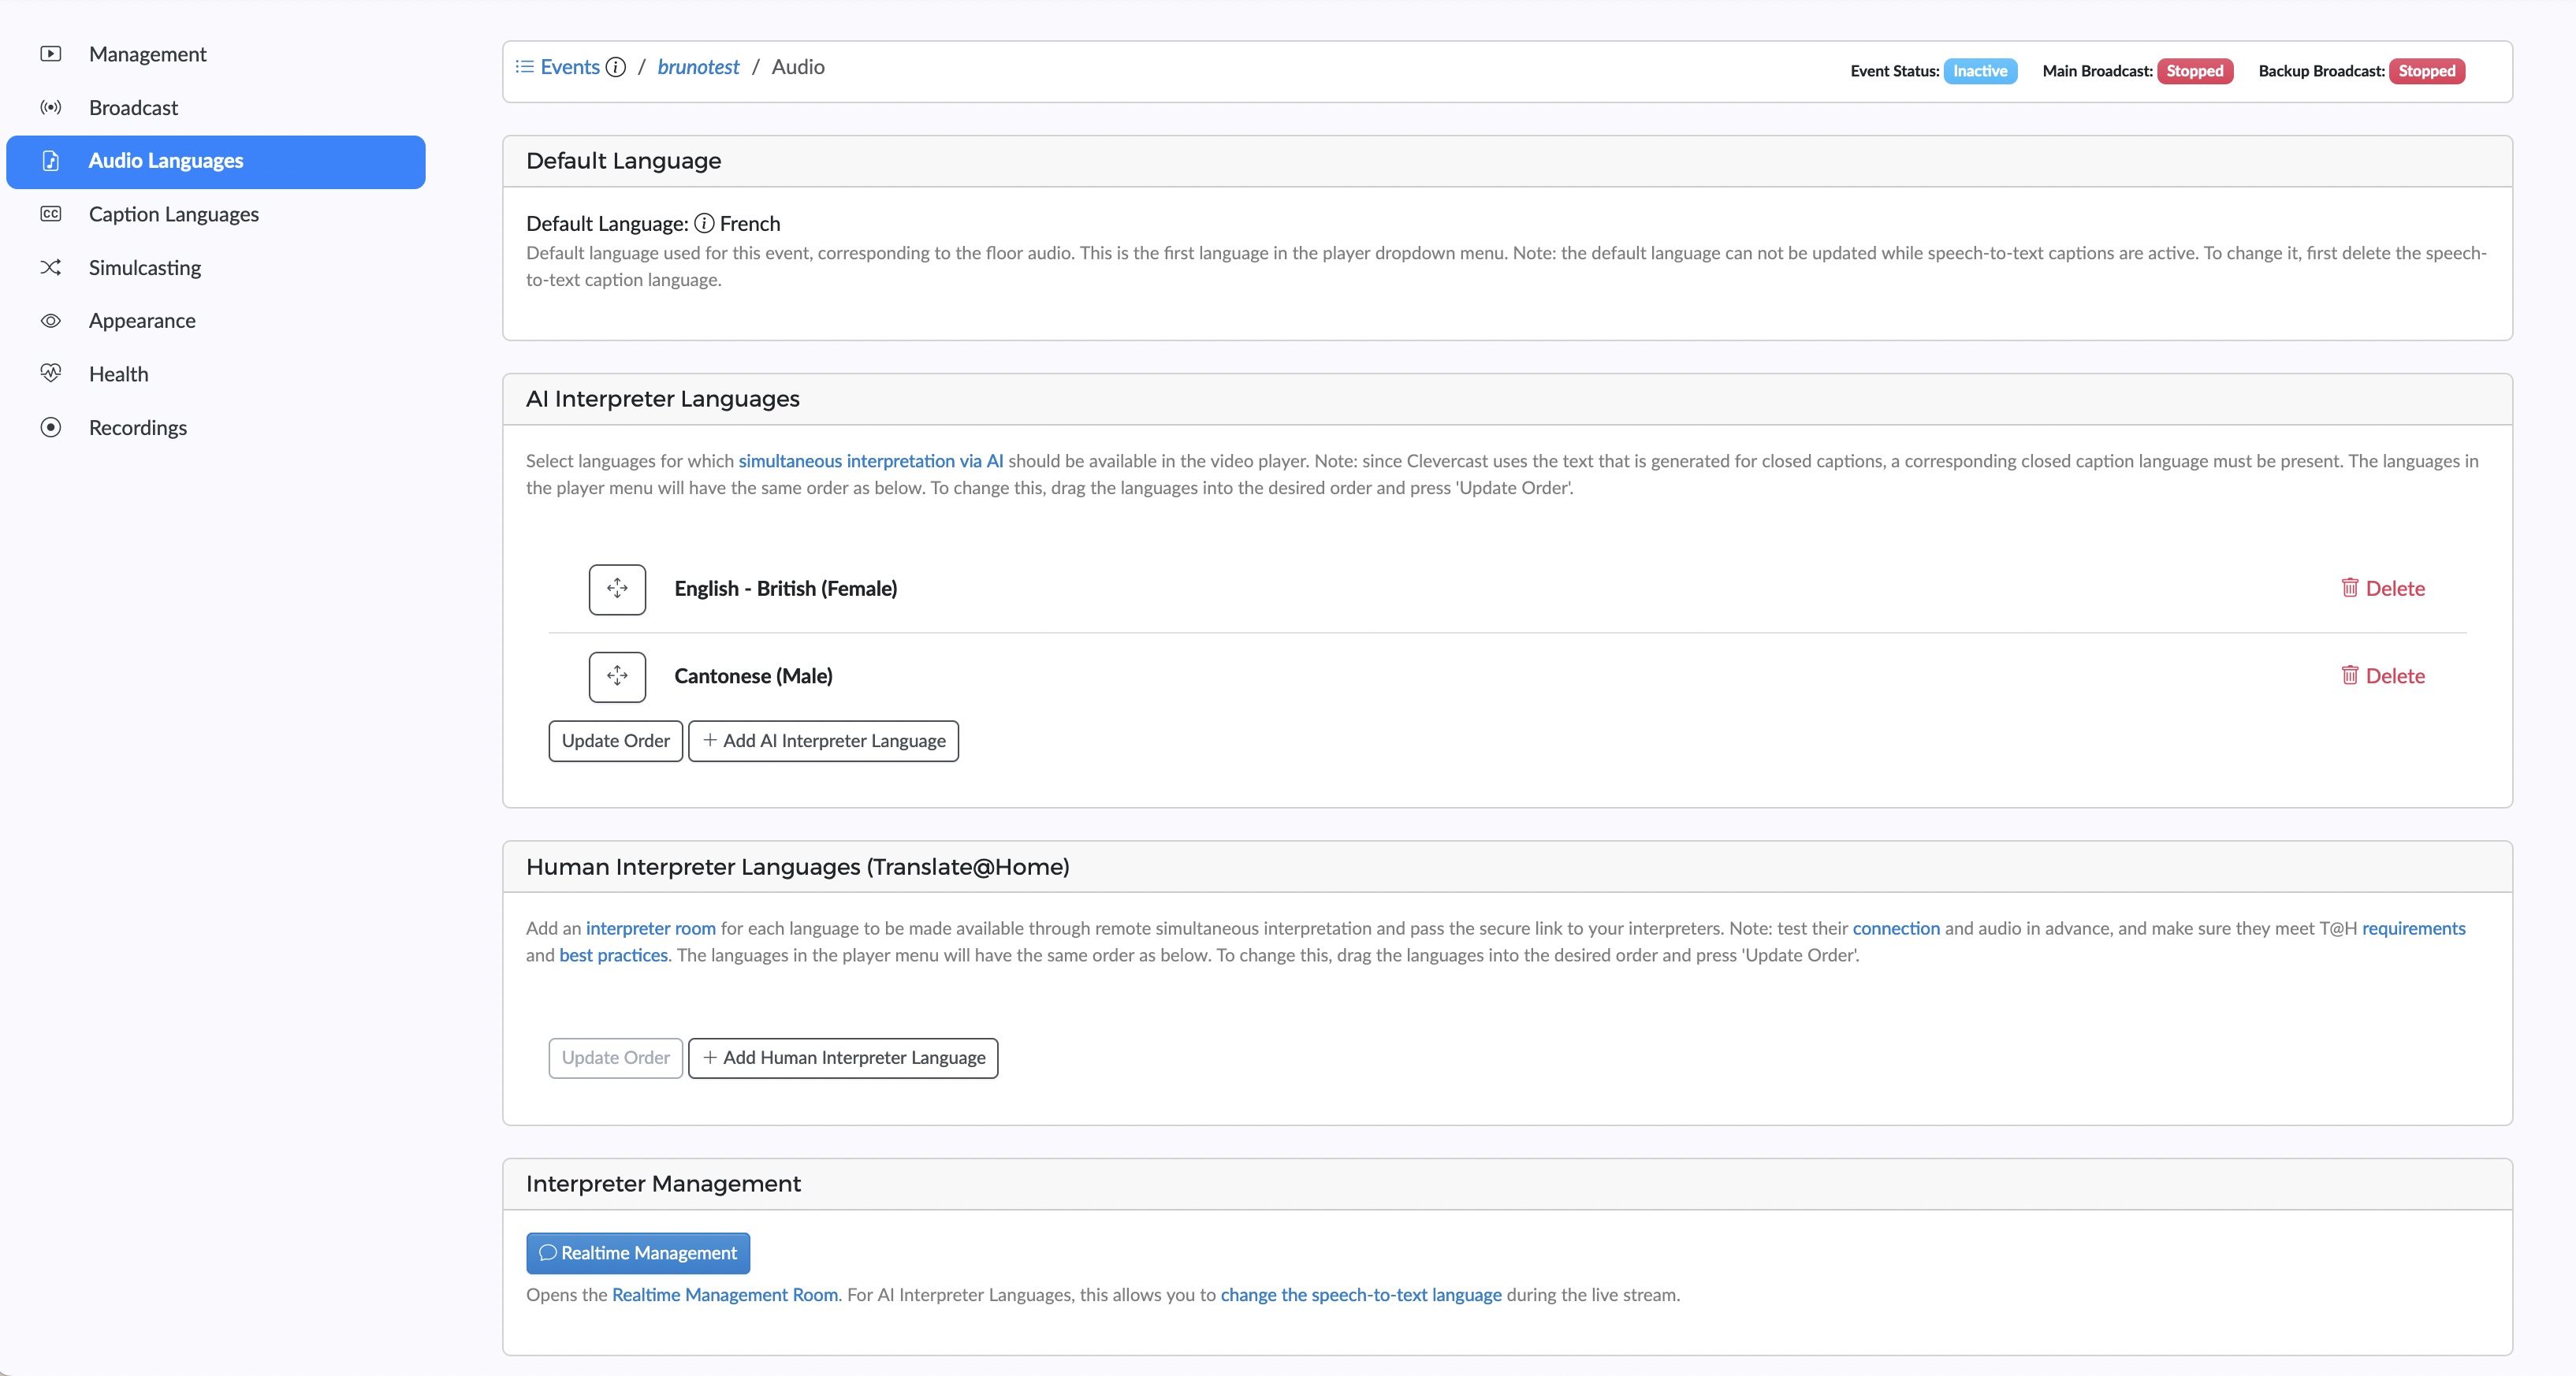
The 'Audio Languages' tab lets you set the default language, which refers to the language spoken in your broadcast (also known as the floor language). When the player is rendered for the first time, this language is selected by default (unless you specify a different language in the embed code or via the API). Afterwards, the player remembers a viewer's selection.
The Default language also determines which language will be used for speech-to-text conversion (this may change if multiple languages are spoken in a live stream, see below). If the floor audio contains multiple languages, you can select Original instead of a real language. In that case, the first language in the player will be called ‘Original’ and contain the broadcasted audio, no matter what language is spoken.
The settings panel also contains the setting 'Provide real-time AI translations for event attendees'. When this is turned on, Clevercast will make the AI speech languages available to on-site participants in real time, and links will appear in the 'Realtime Participant Links' panel at the bottom of the page.
AI Speech languages
In the AI Speech languages panel, you can find the AI speech languages that you selected in the AI wizard. You can add and delete languages, choose a male or female voice, and a regional pronunciation for certain languages (e.g. British, US, Australian or Indian English).
For each AI Speech language, a closed caption language is automatically created on the ‘Caption languages’ tab (if not already present). Clevercast uses the text of the closed captions to generate the synthetic voices. This means that our (optional) tools to improve the accuracy of the closed captions will also improve the quality of the AI speech translations.
So for every AI Speech language, an AI caption language will also be created. In the ‘Caption languages’ tab, you can choose whether the closed captions are made available to your viewers (see below).
When using AI-generated speech translations and/or closed captions the HLS latency will be about 120 seconds. This is the sum of the time necessary for high-quality speech-to-text conversion, real-time correction (optional), text-to-speech conversion, plus the regular HLS latency. This means that viewers will see your live stream with a delay of about 2 minutes (depending on your settings and on whether you use real-time correction). Therefore, you need to start your event sufficiently in advance (= live stream becomes visible to your viewers) and to wait a few minutes before stopping your event (= until the live stream has ended for all viewers, and the cloud recording is stopped).
AI speech translations can be combined with human interpreters in the same live stream (see the Enterprise manual for more info).
Realtime participant links
If you turn on 'Provide real-time AI translations for event attendees', the 'Realtime Participant Links' panel will appear on the bottom of the page. For each language, it contains a link that you can distribute to on-site participants. See the Real-time transcription and translation guide for more info.
Caption languages
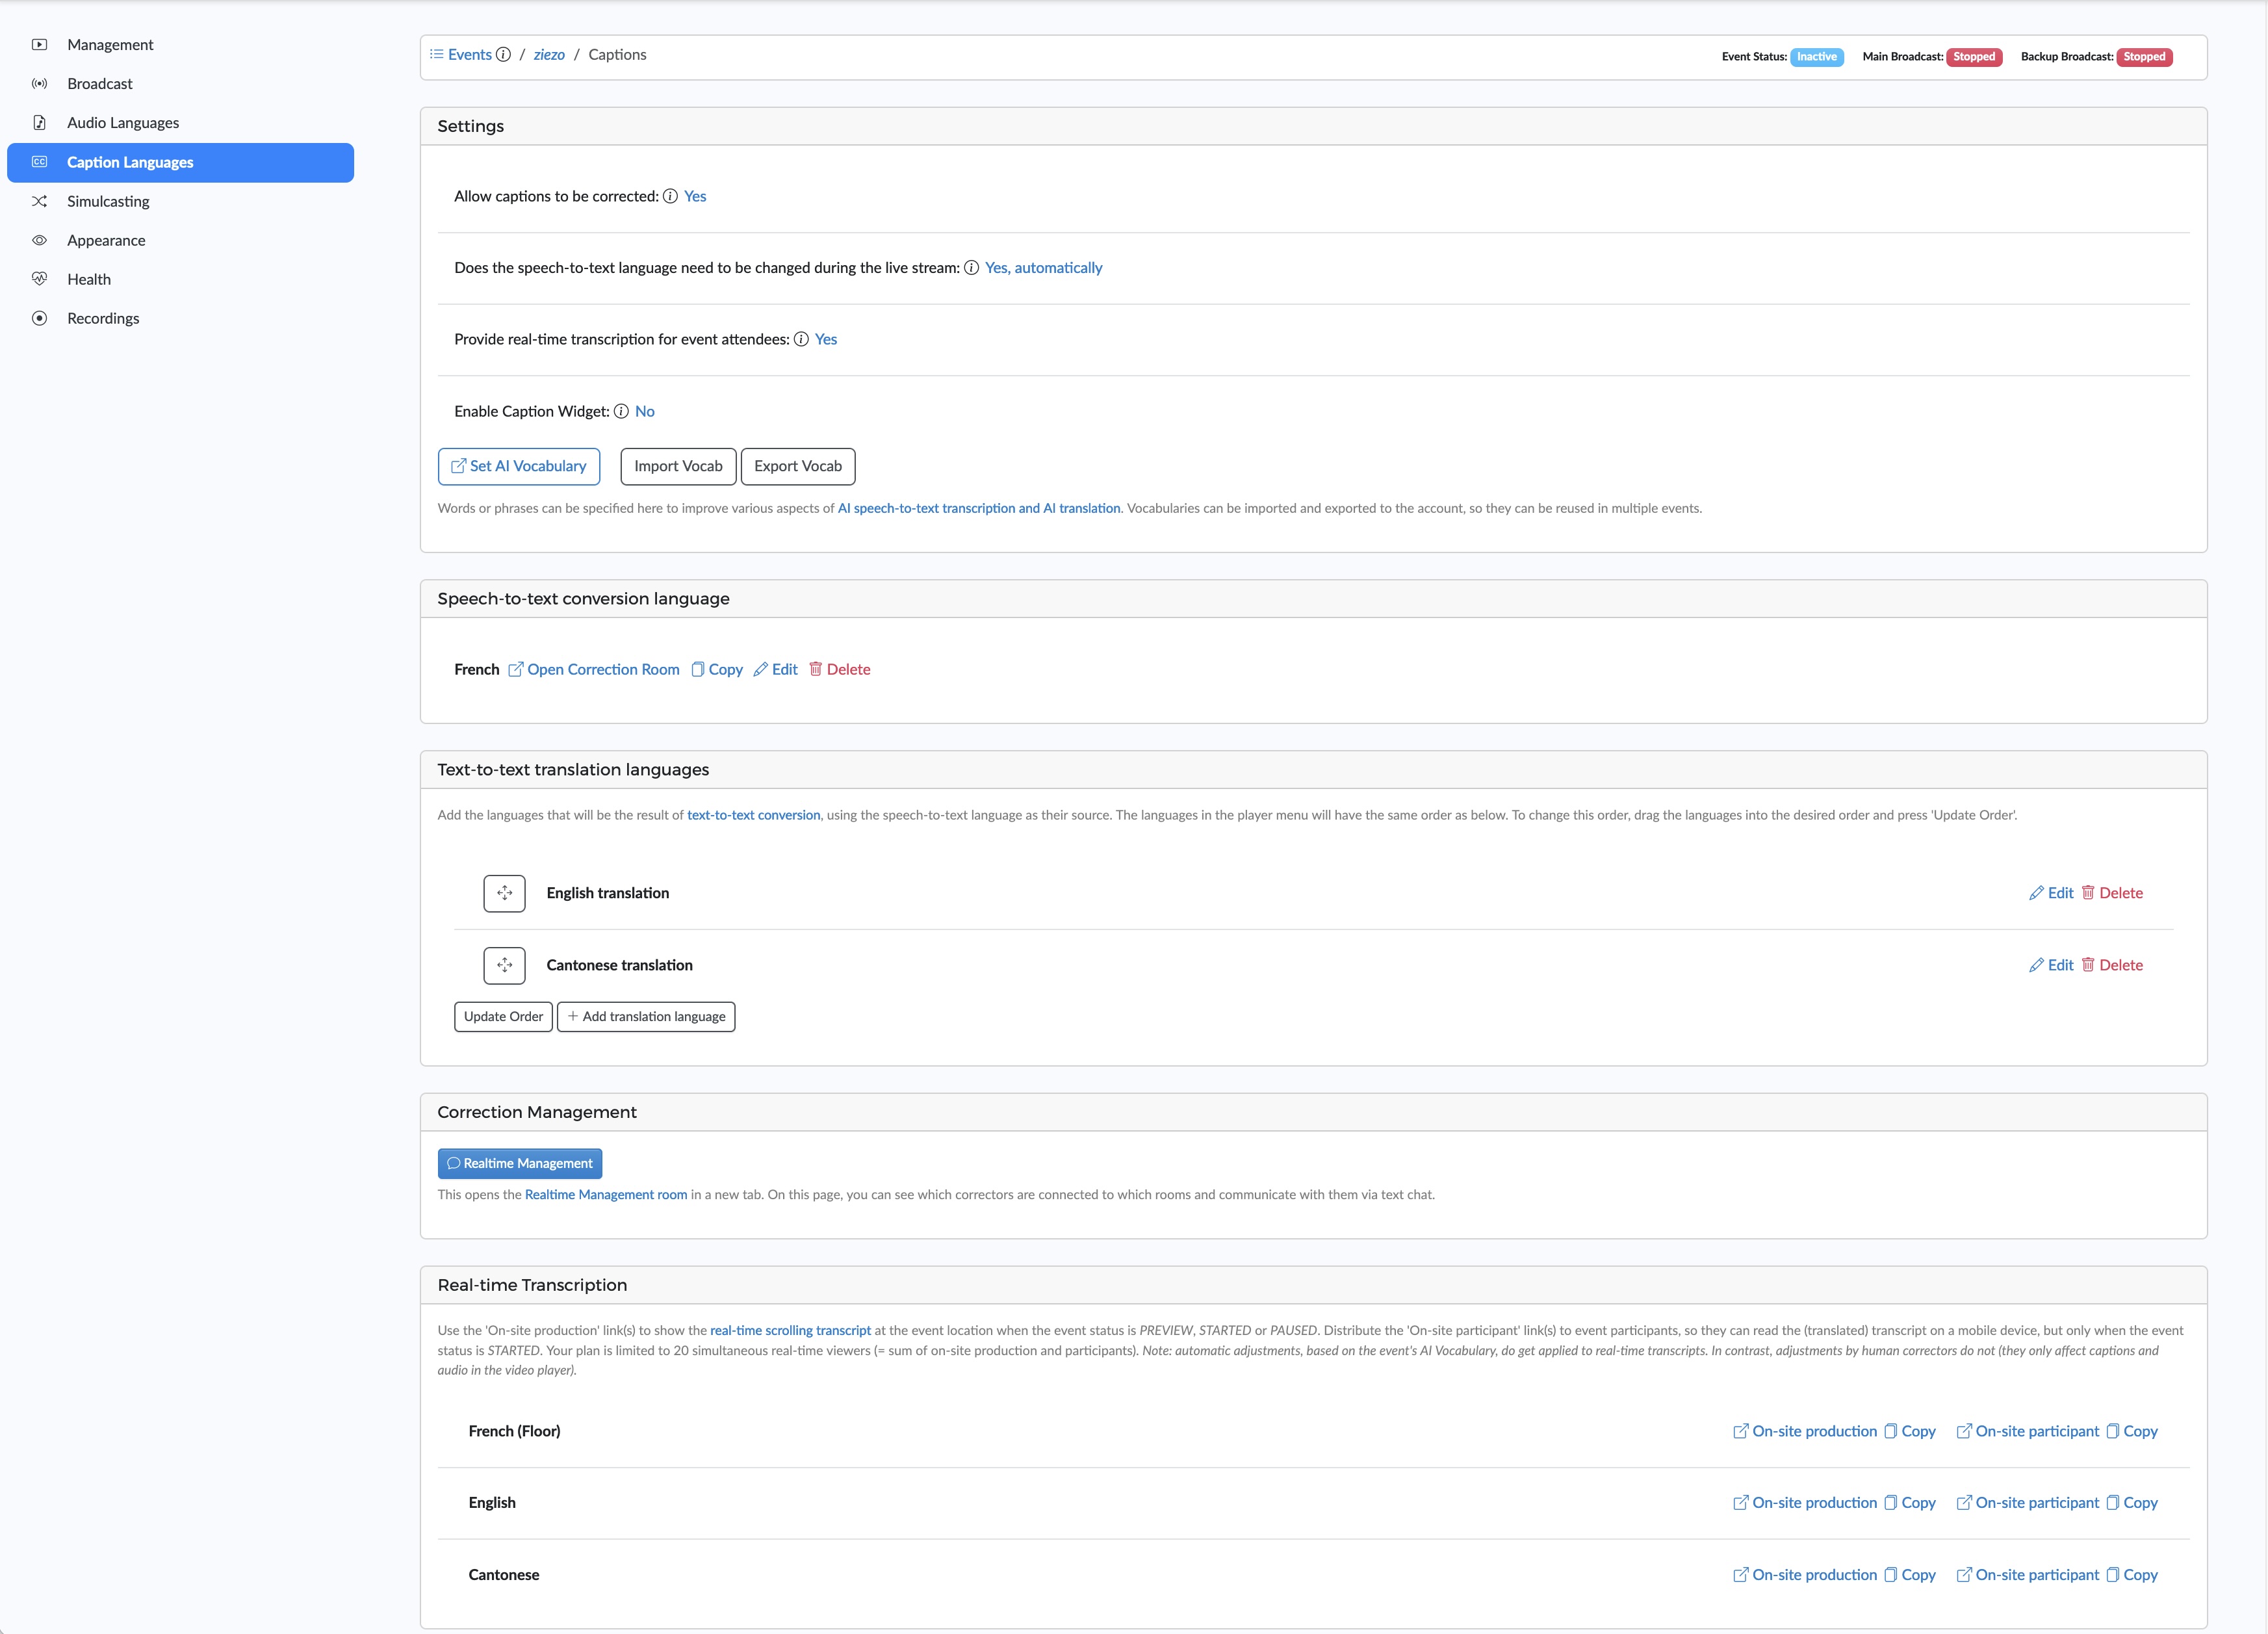
The 'Caption Languages' tab consists of a number of panels, that let you configure AI speech-to-text conversion and text-to-text translation. This includes the (optional) use of tools such as vocabularies and real-time human correction, and the provision of real-time transcription for on-site participants. Note: if you've used the AI wizard to create your event, the configuration is already done.
The settings panel
The settings panel lets you configure specific aspects of captioning your live event. It also contains buttons to update the event's vocabulary, export it to an account vocabulary and import terms from an account vocabulary.
'Allow captions to be corrected': When this is turned on, an interface for real-time correction of the captions is available. Note that enabling this will result in an increased latency of about 30 seconds.
'Provide real-time transcription for event attendees': enable this to make the AI speech-to-text conversion and translation(s) available as a real-time scrolling transcript without delay. See the Real-time transcription and translation guide for more info.
'Enable Caption Widget': lets you display a separate widget with scrolling transcription, in-sync with the player.
'Allow changing the active speech-to-text language during the event' has 3 options:
- 'No': if you know in advance that only one language will be spoken in the live stream.
- 'Yes, manually': allows you to manually change the speech-to-text language when another language is spoken in the live stream.
- 'Yes, automatically': let Clevercast detect the language spoken in the live stream. When a different language is detected, it will be automatically used for the speech-to-text conversion.
During the livestream, it is still possible to change from manual to automatic (and vice versa). However, if you select 'No', you can only change the speech-to-text language after stopping the event.
Don't select 'Yes, automatically' if you know that a single language will be spoken in the live stream. Automatic detection may get it wrong, which could lead to unintelligible captions and speech until the correct language is re-detected and applied.
For more help on this subject, see the 'Handling events with multiple languages' guide.
Speech-to-text language
Every AI event must have a default speech-to-text language (set by the wizard). This should be the same language as the 'Default Language' on the Audio tab, unless 'Original' is set as the event's default language.
For some languages, you can also select the speaker's dialect (if there are multiple speakers, choose the dialect of the majority of them). The choice of dialect helps the language models somewhat, but is not very important.
When you set the event to Preview this language is used (by default) for speech-to-text conversion. If you have selected automatic language detection, this will change when Clevercast detects a different language in the broadcast. Otherwise, the speech-to-text language will remain the same throughout the live stream, or until another language is manually selected.
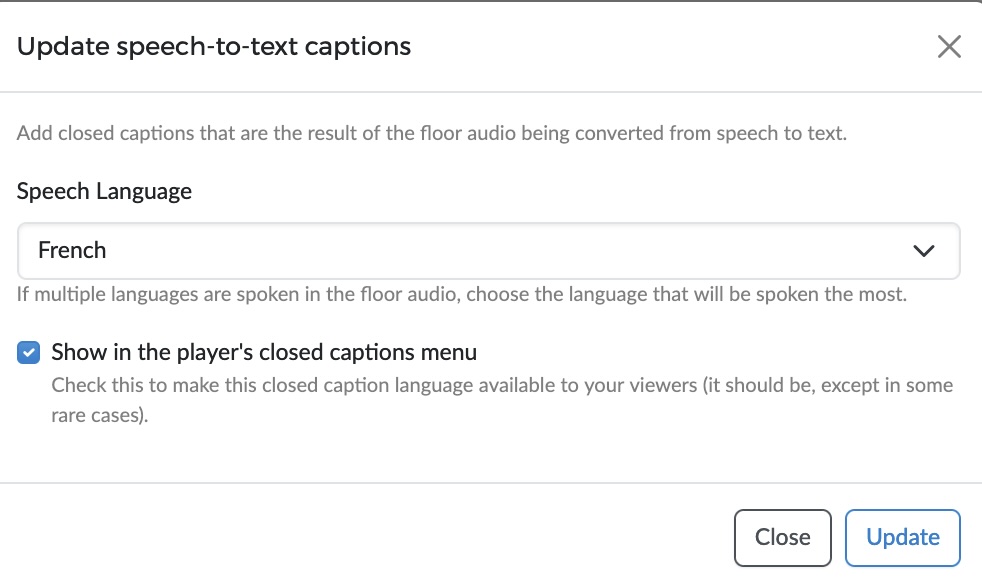
When you edit a speech-to-text language, you can (un)check 'Show in the player's closed caption menu' option. This is intended for events with AI speech translations, in which case the captions will also be used as text source for the speech translations. If you don't want your viewers to see the captions for a certain language, uncheck this option.
If real-time correction is enabled for your event, a link to the correction room is displayed next to the language. You can provide this link to correctors; it contains a secret key that allows them to access the room without having to log in.
Text-to-text translation languages
Your AI event may have multiple machine translated caption languages (the total number of languages depends on your plan). You can change the order in which the languages appear in the player by dragging the languages into the desirable order and clicking 'Update Order'.
For each of the languages, you can use the vocabulary to set a specific translation for certain words and phrases. For example, you can prevent certain words from being translated (e.g. the name of a brand).
Correction Management
Contains a link to the Real-time Management room that can be used for the following purposes:
- watch the incoming broadcast without delay
- manually change the speech-to-text language, or set the speech-to-text language to 'Automatic'
- temporarily stopping AI generation of captions and speech, for example to avoid extra AI hours being used during testing
- communication with the real-time correctors via text chat
Real-time Transcription links
If 'Provide real-time transcription for event attendees' is enabled, this panel contains the links that allow the on-site production team and/or event participants to get access to the real-time transcripts.
Note: since the transcribed text needs to be delivered without delay, adjustments by human correctors (if any) will not affect the transcript. However, automatic adjustments — resulting from terms being part of the vocabulary — are also carried through in the transcript.
Simulcasting
The 'Simulcasting' tab lets you simulcast a live stream via RTMP and SRT to social media channels and other endpoints (e.g. Periscope, Twitch, a custom CDN or OTP platform...) while adding a burned-in subtitle to the simulcasted stream. This is an optional feature: you will only see the 'Simulcasting' tab if it's part of your plan.
For info on how to configure and manage simulcast targets, see the Simulcasting manual.
You can configure the look and feel of burned-in subtitles via the 'Simulcasted subtitles' panel on the 'Appearance tab' of your event. For example, see our tutorial on how to simulcast live streams with AI subtitles to YouTube.
Appearance
The Appearance settings determine the look and feel, accessibility and behavior of the embedded Clevercast player:
- Player: determines which Player profile will be used by the embedded player. By default, this is the Live Player which has no pause button and autoplay and muted turned on.
- Viewing Profile: determines the accessibility of the live stream in the embedded player. By creating a viewing profile, you can whitelist and blacklist viewers based on their domain, IP address and country. By default, the built-in 'Public' viewing profile is used, which doesn't limit accessibility.
- Player Countdown: if set, the player will display a countdown timer, either until your event status is set to
Started, or until the countdown is complete. - Images: images displayed in the embedded player when the event status is not
Started. You can set a separate image per status and/or a general image that will be displayed for each status without an image. - Messages: messages displayed in the embedded player when the event status is not
Started. A message will only be displayed if no image is available. If no image or message is set, Clevercast will display its default message for the status. - Simulcasted subtitles: only if simulcasts with burned-in subtitles are part of your plan.
Health
The Health settings give you feedback regarding the broadcast you are sending. The information on this page indicates when Clevercast receives your broadcast, includes warning concerning the configuration of your encoder, an incorrect bitrate or frame rate, a choppy stream....
The messages on the health page can have three different levels:
- Info: these are messages for informational purposes. For example to indicate that an incoming stream is detected.
- Warning: these messages are displayed if your broadcast is not in line with our recommendations or best practices. By themselves, these are not major issues, but they may cause lower quality or give rise to other problems (e.g. a frame rate that is too high may cause not all frames to arrive in a timely manner).
- Error: these are issues that will give rise to a failing or faltering stream. They require you to take action.
Errors and warnings are also shown at the top of all other event tabs.
Recordings
This tab lists the cloud recordings for this event. The list of cloud recordings for all events is available via the Live > Recordings menu.
A Cloud Recording is created every time an event is started. The recording can be downloaded or published after the event is ended or paused.
The broadcasted video and audio streams can be downloaded as an MP4 file, the closed captions as WebVTT files and the AI speech translations as AAC files.
See the Enterprise manual for more info.
Video on-Demand
You can publish the recording as a Video on-Demand item, so you can embed it (in the same way as the live stream), download the trimmed version (optionally with single language audio) or use it as the source for simulive streaming.
Note: once a recording is published as a VoD item, you can also use AI to generate closed captions for it.
